Published September 14, 2021 06:59AM
Technical FAQ: Custom steel recommendations, more on tubeless plugs, and sodium hydroxide cautions
Options for custom steel frames, more advice about tubeless repair plugs, and un-sticking sticky components.
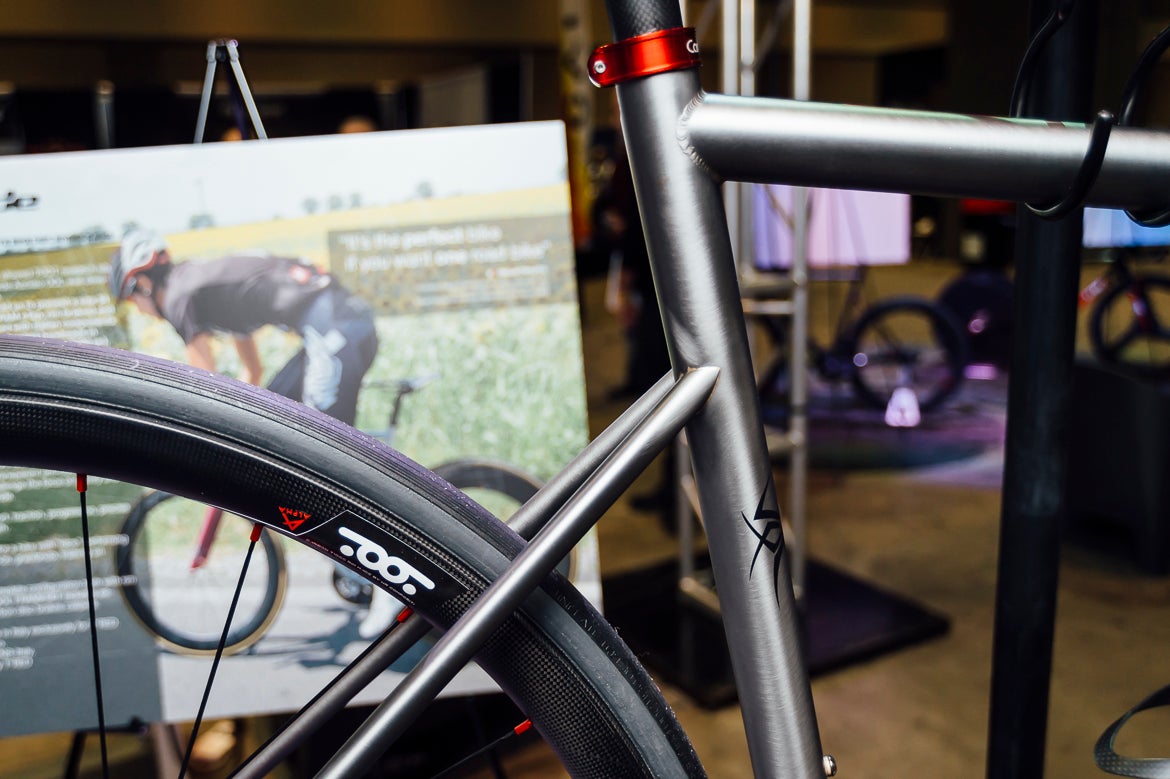
T°red also showed off a sub-15-pound steel frame 54cm road bike with beautiful fillet seat stays. Photo: Bob Kidd Photography
Have a question for Lennard? Please email him at veloqna@comcast.net to be included in Technical FAQ.
Dear Lennard,
I’m getting a new steel road frame — probably Reynolds 953. I’d like to have electronic shifting. Given all the industry standards are constantly changing, what would you recommend for:
- Rear dropout width. Wouldn’t it just be better to go with something crazy wide like 148mm and then use spacers to shorten as needed for whatever new rear cassette standard they come out with 5 years from now? I hate when manufacturers come out with something new and my rear dropout cannot accommodate it.
- I’m not sold on disc brakes, but should I get the frame built for accommodating both disc brakes and rim brakes assuming that’s even possible? Do you think they will still be making high-end rim brakes 10 years from now? (Yes, I know that disc brakes require a beefed-up front fork and rear dropout).
- Can I run all my electronic shifting cables externally on the tubes? Are manufacturers trending towards putting the battery inside or outside of the tube (since I’ve seen both versions)? I am reluctant to have holes drilled into my frame since that just seems like a recipe for corrosion even with grommet protection.
— Phil
Dear Phil,
Your first question is an interesting one. I suppose, instead of getting standard 12x142mm dropout spacing, you could get 12x148mm (BOOST) rear spacing and add a 3mm spacer to each end of the axle. I would wonder whether your intention to anticipate what might be coming down the pike will make it a pain in the ass from the get-go and then not end up hitting the bullseye anyway when standards change in the future. That would certainly not be a choice I would make. Rather, I would go with what works now so that everything works as designed. Then, if things change in the future, I would count on still being able to find wheels that fit.
Question number two is a no-brainer. DO NOT order a frame that fits both disc brakes and rim brakes; make it only for disc brakes. A huge reason for disc brakes is that it doesn’t limit your tire size selection, but by making the frame and fork fit rim brakes, you will be limiting the bike to a maximum tire size of 28mm. The way tire size has been increasing on road bikes at no cost of rolling resistance, it’s more of a certainty that this trend will continue than that your fears in question one will come true in a similar timeframe.
ADVERTISEMENT
Also, you won’t find a carbon fork that is drilled for a rim brake and set up with disc mounts, so you would have to get a custom fork (probably steel). This will add pounds to the bike. And having all of the cable routing and hose routing on the frame and fork for both rim brakes and disc brakes will result in unsightly, unused cable guides or hose guides.
In answer to your third question, no you cannot have external electronic-shift wires. Neither Shimano nor Campagnolo supports such a thing. The battery is internal, and the wires need to be as well. I agree that holes in a steel frame for internal guides are an invitation for corrosion and early demise of the frame. The only way to avoid it and still have electronic shifting is to go with a wireless system. Right now, that is only SRAM. Shimano’s new semi-wireless Di2 will not eliminate holes in the frame, since you will still have wires connecting the front and rear derailleurs to the battery inside the seat tube. So you will at least have a hole in the seat tube near the front derailleur and one at the end of the chainstay or in the rear dropout.
― Lennard
Regarding tubeless tire plug use:
Dear Lennard,
I have been riding tubeless for several years now both on the road and in cyclocross and gravel. On the road, I have been using Hutchinson Sector tires for 5 or so years and have also been using Dynaplug repair kits. I use Stan’s Race Sealant.
On the road, I run the Sector 28mm at 78lbs front, 80lbs rear. (I weigh 165lbs). Over several years I have experienced just a handful of punctures that did not seal. When I notice sealant escaping (hear it and/or see it), I prefer to stop and get off the bike, find the puncture then rotate it to the bottom. I have found Dynaplug to repair the puncture well enough to complete the ride but at reduced pressure (probably 40-50 psi).
ADVERTISEMENT
If I inflate the punctured and repaired tire to full pressure, the plug will eventually fail. Instead, I now prefer to use the plug fix to get me through the ride and back home. I then remove the tire and patch the puncture on the inside of the tire casing. This method allows me to run the tire at full pressure for the normal life of the tire.
— Chuck
Dear Lennard,
I read the recent letters in your FAQ column about plugging tubeless tires and I wanted to put in a ‘plug’ (pun intended) for patching tubeless tires. I agree with Jim’s comment about plugs only be used short-term. A better option is to remove the plug at the earliest opportunity and patch the tire. I have patched many tubeless tires and subsequently been able to get a full life out of the tire. I have never patched a tubeless road tire (I don’t have road tubeless), but I have had good luck with wider gravel tires and MTB tires. Rather than use plugs, auto/tire shops patch the interiors of car tires. They use a different kind of patch for car tires, but the principle is the same.
In any case, I learned this method from a video that was posted on the Stan’s website in the early 2000s. It may still be available in updated form.
- Remove the tire and remove the sealant. Locate the hole.
- Clean the inside of the tire around the hole with brake parts cleaner or another volatile solvent. This is an important step. The patch won’t stick if there is residual latex sealant. I think the solvent also softens the rubber and makes the patch adhere better.
- Apply the glue and patch as you would if you were patching a tube.
- Insert a tube, reinstall the tire, and inflate. The tube pressing on the patch for a few hours really fuses the patch to the interior of the tire.
- Remove the tube, add sealant, and reinflate as you would with any tubeless tire.
It is not an easy or fast procedure, but it is better than having to trash a brand new, $70 tire.
— Perry
ADVERTISEMENT
Regarding the stuck seatpost:
Dear Lennard,
With respect to questions about chemical agents and metals: sodium hydroxide is very corrosive to aluminum. Try spraying a small amount of oven cleaner on some aluminum foil.
I worry about prolonged contact with ammonia (a base) or colas (acidic) but I can’t speak to what quantity or duration is safe. But strong bases are a “no-no” with aluminum.
ADVERTISEMENT
Anyone handling strong bases (or acids) should wear good eye protection. Burned skin can regrow, but you only get two eyes, and bases will very quickly cause serious corneal injury.
— Jonathan, MD, PhD
Lennard Zinn, our longtime technical writer, joined VeloNews in 1987. He is also a custom frame builder (www.zinncycles.com) and purveyor of non-custom huge bikes (bikeclydesdale.com), a former U.S. national team rider, co-author of “The Haywire Heart,” and author of many bicycle books including “Zinn and the Art of Road Bike Maintenance,” “DVD, as well as “Zinn and the Art of Triathlon Bikes” and “Zinn’s Cycling Primer: Maintenance Tips and Skill Building for Cyclists.” He holds a bachelor’s in physics from Colorado College.
Follow @lennardzinn on Twitter.