Published January 29, 2016 08:00AM
The ‘e’ is for EASY: Installing SRAM eTap
January 28 2016 -Occasionally a product comes along that makes everything that came before it seem archaic. For us, SRAM Red eTap is such a product. Spend hours fishing wires or cables through a frame? Peering into tiny holes with flashlights? Frames with holes drilled and molded in them for wires? Wires? It’s 2016, only your table lamp needs wires. Hell, Cable TV is a dinosaur.
peloton
When SRAM offered to come by our Tech HQ in Ojai, Ca and have SRAM Technical Rep and eTap master, Nate Newton, do a Red eTap install for us on a flashy new Specialized S-Works Tarmac we jumped at the offer. We were still suffering PTSD from threading Di2 through the hyper integrated front end of a new Trek Madone and we couldn’t help but wonder, ‘Just how easy is eTap to install?’
RELATED: Check out our first ride report.

Our build began with everything in place but the eTap essentials – levers, derailleurs and blips. eTap really only needs four pieces to work – two levers and two derailleurs, but the optional Blips are a nice luxury.
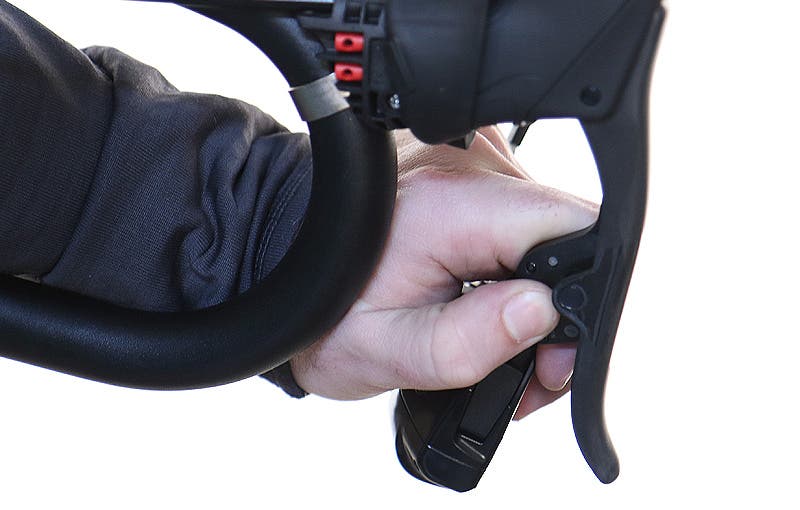
The levers are installed like any traditional lever, just dial them into personal preference and tighten down.
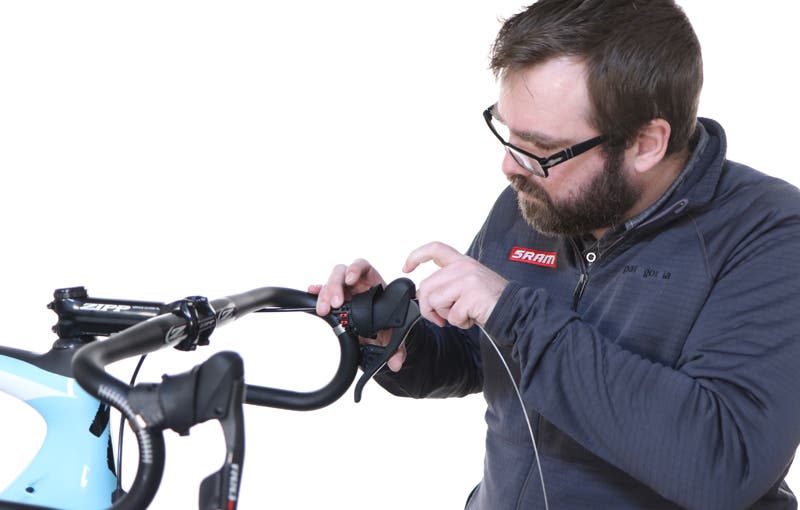
Until wireless braking is a reality they are cabled and set up like Red of old. Luckily the Tarmac requires only internal routing of the rear brake and it threads through quickly.
ADVERTISEMENT
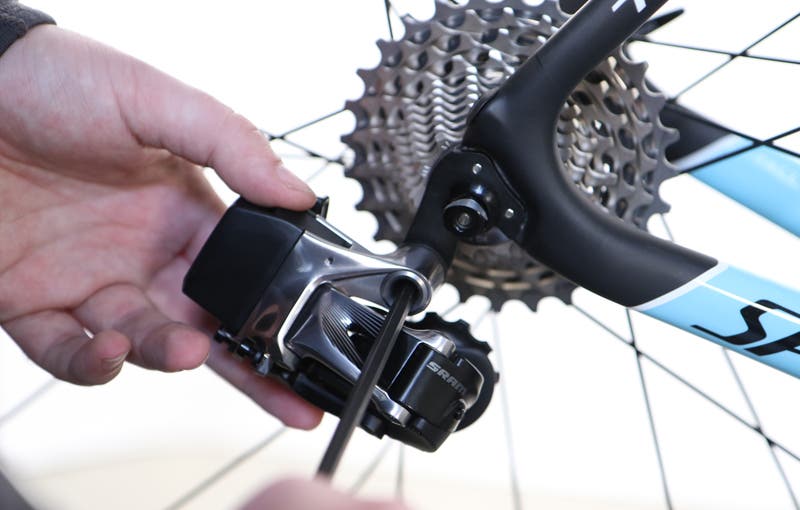
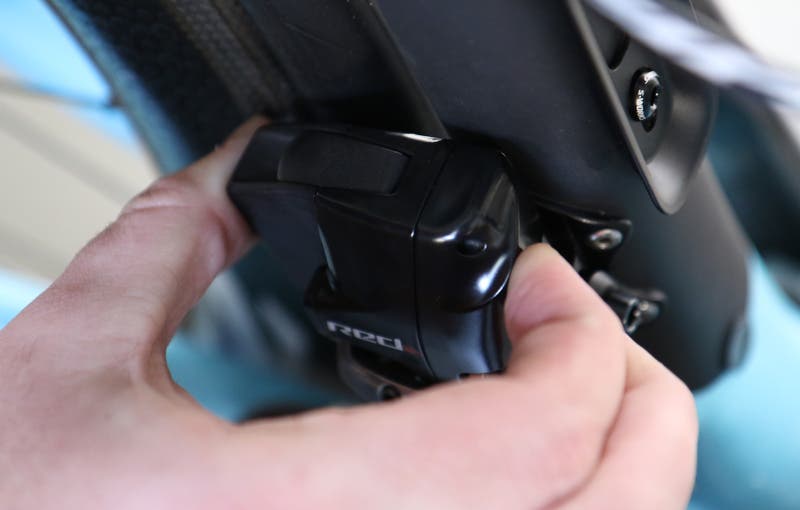
Once the brakes are dialed the fun part starts. Nate started with the rear derailleur, again, bolt it on like a mechanical derailleur.
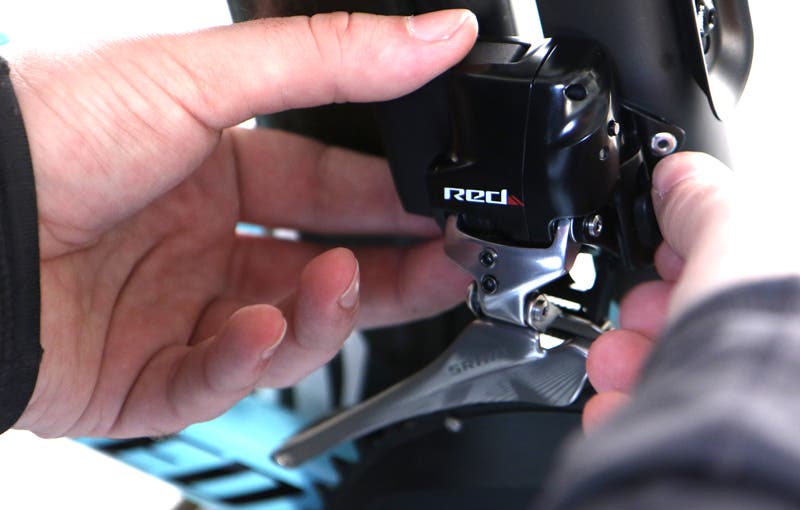
The front derailleur is installed like a mechanical SRAM Yaw derailleur. Correctly align the markings on the derailleur cage with the chainring and the derailleur can shift through all 22 gears with no need to trim. Don’t forget the little wedge that goes around back to ensure the powerful motor has a stiff surface to work against.
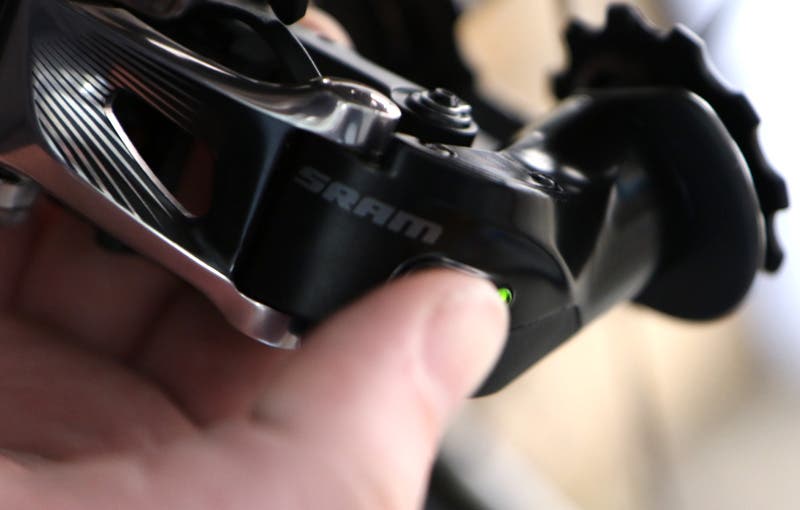
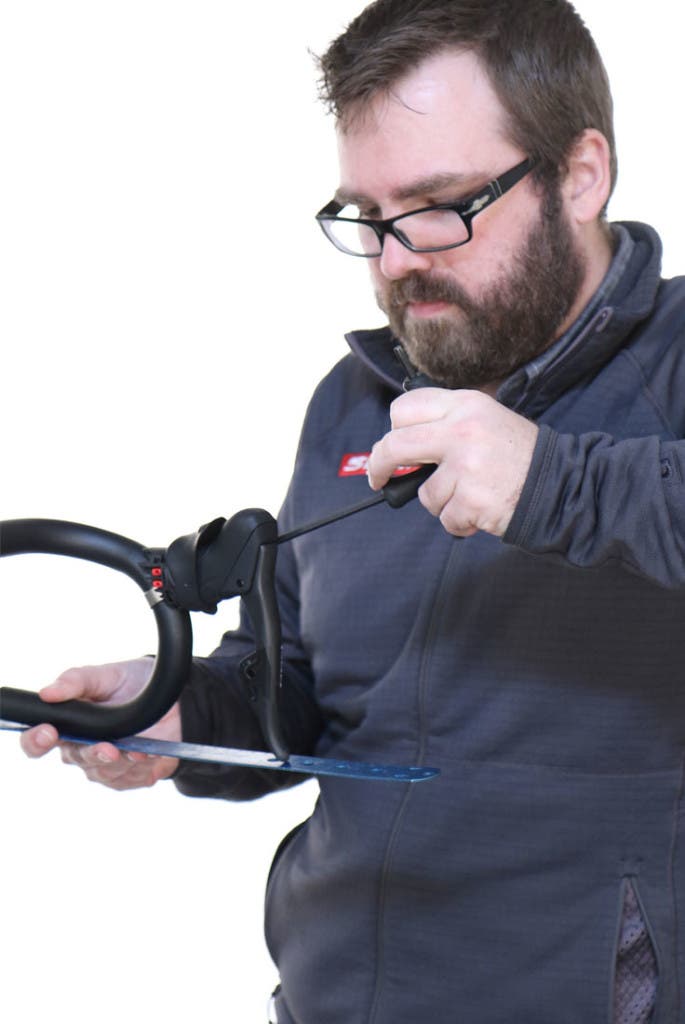
Then it was time to pair. Can you work an Apple TV? You have more than enough technical chops to do this. The rear derailleur is first since it is the master device. Hold the function button until the green light flashes slowly, then press and hold the front derailleur’s function button and when it flashes quickly, it is paired with the rear.
Then, one at a time, hold the function buttons on the inside of the levers until the rear derailleur flashes quickly. Then hit the function button on the rear to end the session. If you forget to do that it times out in 20 seconds anyway. It takes a minute… if you’re a slow poke.
ADVERTISEMENT
Ensuring the limit screws are set correctly is a bit different than a mechanical system. Press the function button on the lever and when you click the lever itself the derailleur moves only .2mm, allowing precise alignment of every cog.
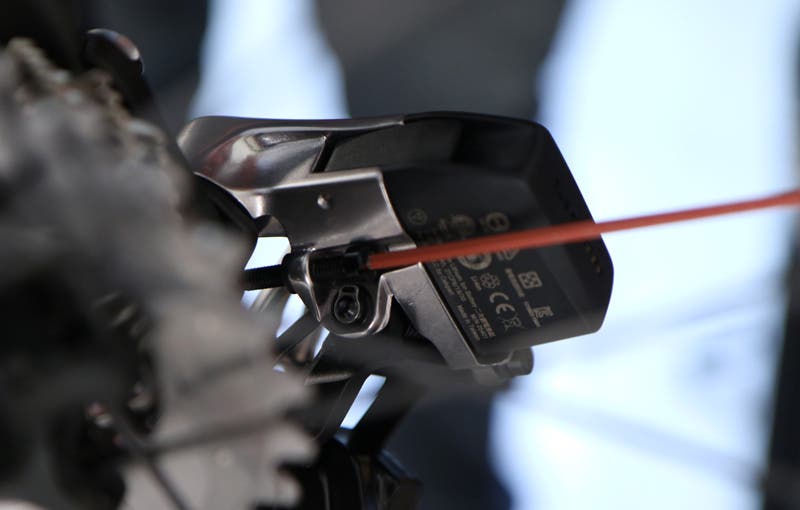
Once the low and high position are trimmed, just set the limit screws so they contact the stops at both ends.
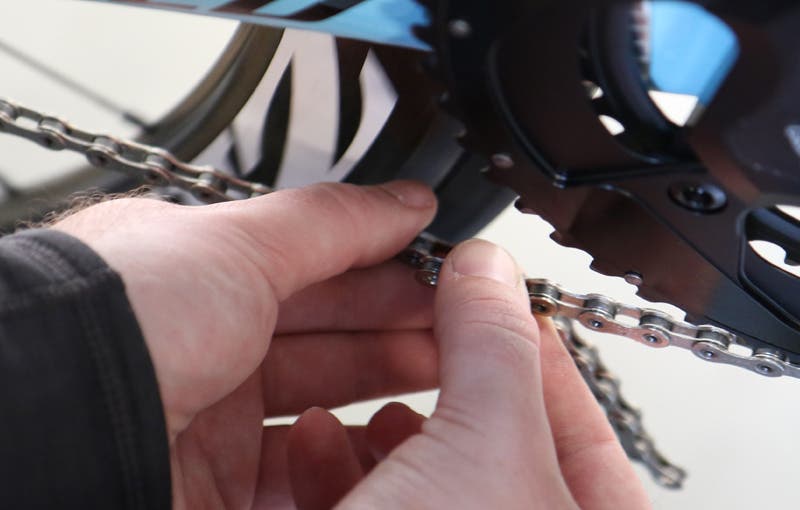
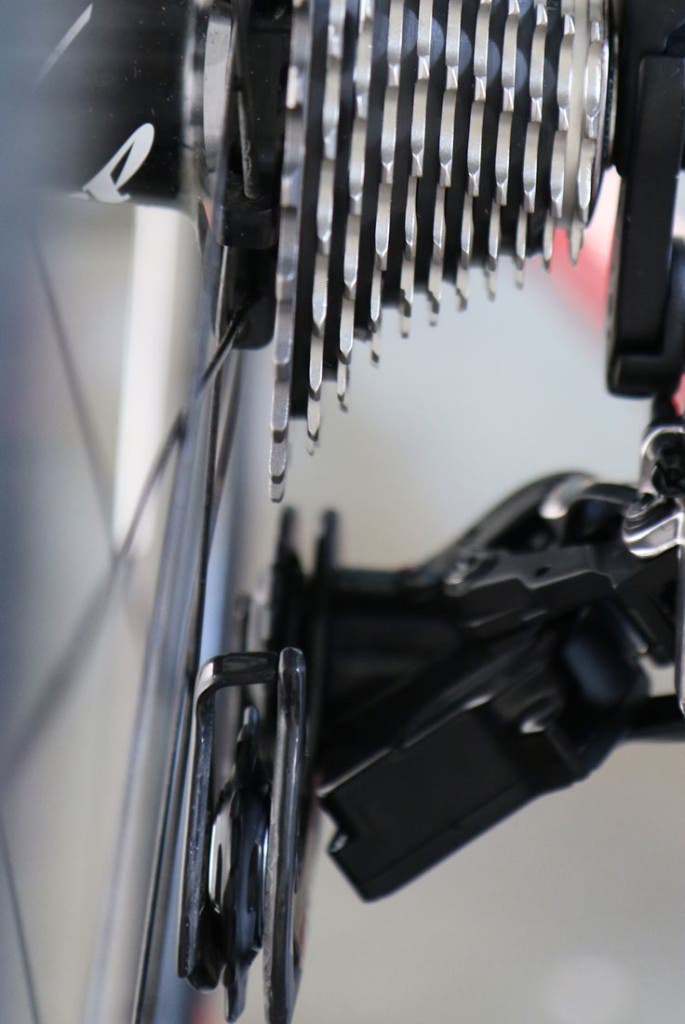
Now it’s time to install the chain, the same length a Red 22 mechanical chain would be. Fine tuning the rear shifts can now be done using the same trim button used to help set high and low stops. You’ll know when it’s right because the bike will shift with almost no chain noise, thanks in part to the cassette’s stealth rings.
Since eTap requires both levers to initiate a front shift and mechanics only have two hands, a button on the front derailleur can shift it up and down for fine tuning.
ADVERTISEMENT
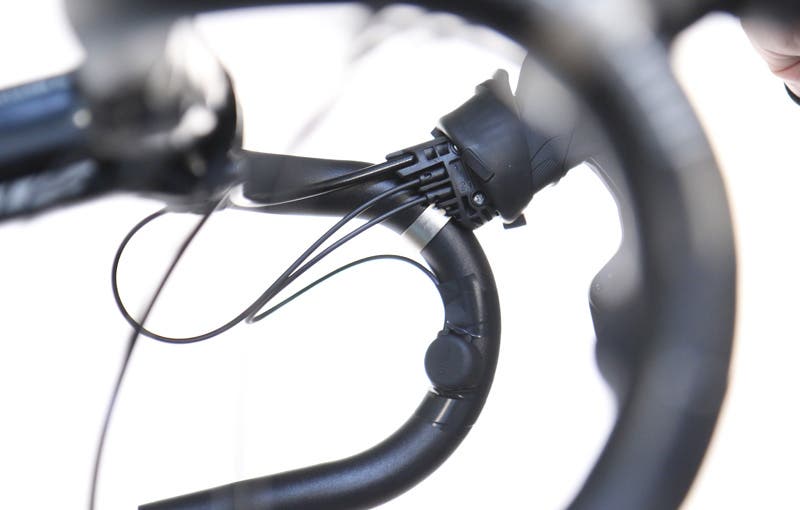
Once paired and trimmed it’s time to set up your remote shifters, or Blips. With two ports on each lever you can run Blips on the drops and the tops. Each Blip mirrors the lever it is plugged into.
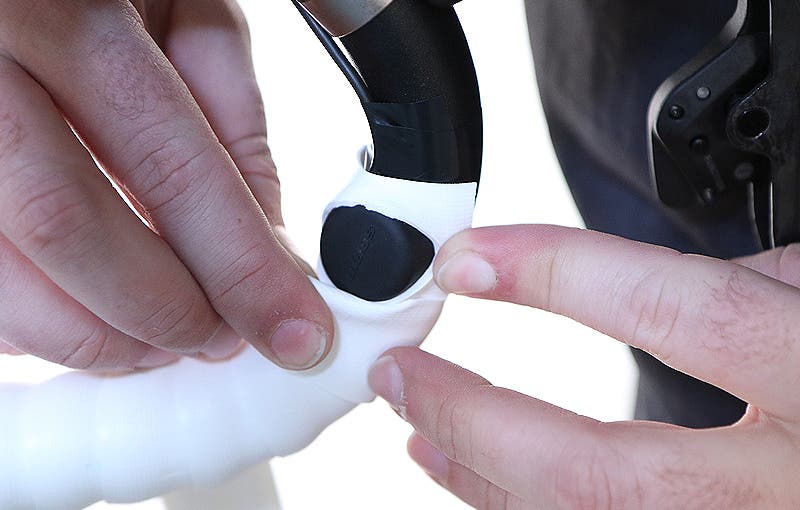
Nate showed us a trick way to tape the Blips, since they seem to be easier to use without bar tape over them. Cut a small hole in a short piece of tape, run it over the Blip, then as you tape the rest of the bars, roll the edge of the tape over as it passes by the Blip,which makes a very clean finish around the remote shifter.

While we don’t expect to be as fast or proficient as Nate, we feel confident we could now easily set up an eTap bike. The learning curve is short and shallow, showing eTap not only simplifies things for riders at the bars and frame manufacturers in design and production, but for mechanics too. Some may lament the loss of artistry that is necessary to dial in a mechanical set up perfectly, but there will always be a place for that type of skill, probably at a vintage shop, right next to the guy that still knows how to rebuild the carburetor in your 1968 Land Cruiser.
ADVERTISEMENT
More: SRAM.com