Updated January 27, 2025 05:43PM
Maximizing Space: 6 Tips for Safe & Secure Bike Storage
Secure bike storage solutions for any space, from compact apartments to large garages, that make sure your bike is always safe and protected.
(Photo Josh Ross/Velo)
It’s 2025 and if you haven’t noticed housing is crazy expensive. Because of this, safe and secure bike storage is important but finding creative ways to maximize storage space and keep your bikes both safe and secure has never been more of a challenge.
I live in a very small house and the bikes that come through for our bike reviews need a better spot than the kitchen. I’ve spent years trying to solve this problem. I’ve tried pretty much everything on the market and this year, I finally feel like I’ve got it dialed. I’m going to start with easy, cheap, and no installation required then get more complicated as we progress. Down at the end I also get into security a bit as that’s an important consideration.
1) The Easiest

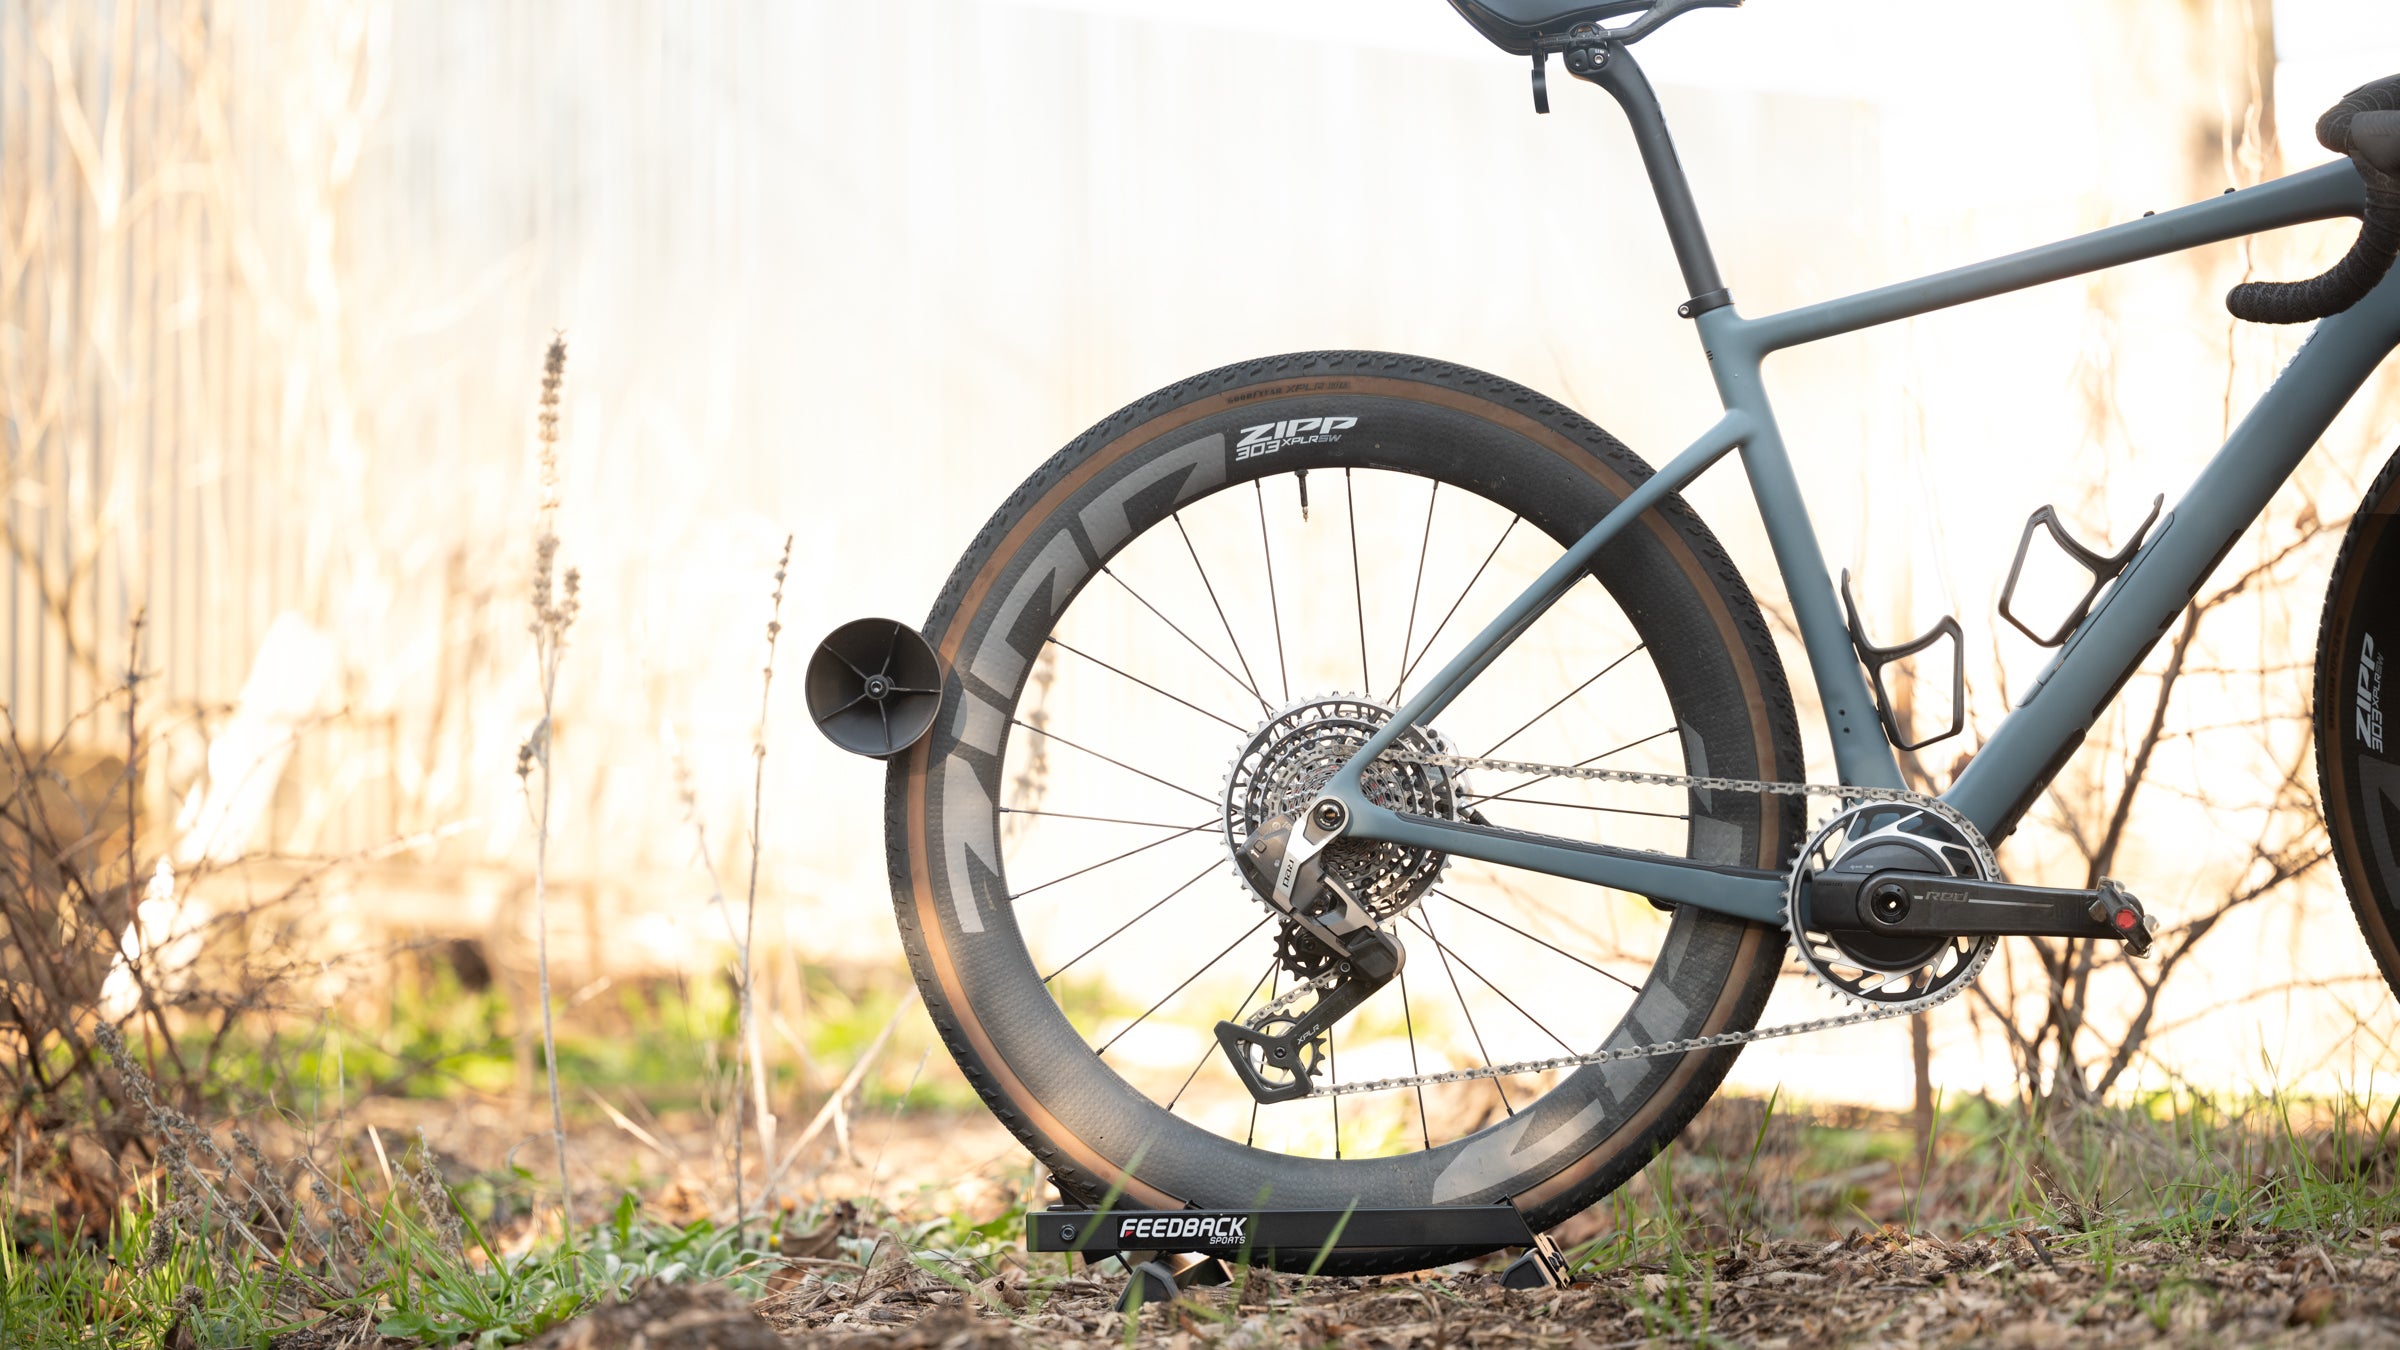
Feedback Sports Rakk 2.0
The first option I’m sharing with you is called the Feedback Sports Rakk 2.0. If you’ve got a bike leaning against a wall somewhere, this is what you need. It doesn’t save any space but it’s inexpensive and requires zero installation. Just open it, put it on the ground, and place your bike in it. You’ve now got a bike that won’t fall over.
ADVERTISEMENT
It’s also good outdoors. I use it for all of my pictures and I’ve never had it falter on uneven ground or in the wind. If you drive to the start of a ride and want to stand up a bike next to a car that’s a great use for this. It even folds up for ease of storage and transport and there’s a ebike version with a little shelf for the charger.
In my small house I often take the bike I’ll be riding in the morning and move it from wherever I have it stored to the Rakk 2.0 the night before. That way I don’t wake anyone in the morning.
If you have room for a bike on the ground this is an easy solution.
Check out the Feedback Sports website for more info.
ADVERTISEMENT
2) Easy but a little harder

Topeak dual touch bike stand
Sticking with easy to install, next on my list is the Topeak dual touch bike stand. The Rakk stand is simple but it doesn’t add storage. The Topeak adds storage by stacking your bikes vertically and the special sauce is that it requires no drilling. Unfortunately the no drilling thing does mean it comes with a few, small, drawbacks.
The way this thing works is by expanding against the floor and ceiling and there’s a foot pedal to add more tension once you’ve got it close. Because you don’t want it to move, it’s possible to accidentally crack the ceiling. You are supposed to position it under a ceiling joist or beam but that kind of defeats the ease of positioning and makes it hard to put it where you need it.
ADVERTISEMENT
What I’ve done is add plywood to spread the load and avoid cracking the drywall. It’s not exactly pretty but that’s on me. Nothing says your install couldn’t look better.

There’s no fixing the other issue though. Because this is a no drill option, there’s a continuous pole stretching from floor to ceiling. That pole can get in the way. The crank needs the correct position so it doesn’t rub and once it’s in place you can’t rotate it far. You can’t use this as a makeshift workstand.
Overall, there’s some drawbacks but the Topeak stand is a good way to avoid drilling. It keeps your bikes out of the way plus adds storage with vertical stacking. Generally I’d consider this a fair trade.
Check out the Topeak website for more info.
ADVERTISEMENT
3) More complicated

Feedback Sports Velo Wall Rack 2D
Now we get into solutions that require some drilling. If that’s an option for you, these are my favorites.
First up is the Feedback Sports Velo Wall Rack 2D. The basic concept is that it holds the underside of the top tube. I mention that both as a way of introducing it but also because there are a ton of options with fancy handcrafted wood and leather and this isn’t one of them. The Feedback design is simple and functional with mounting that uses only a single wall stud.

The reason I’m talking about this instead, in addition to the single stud mounting, is that it’s adjustable. It doesn’t matter if your bike’s top tube is flat or angled and you can space the frame out from the wall. This works with flat bars or drop bars.
ADVERTISEMENT
Bottom line, the design isn’t the prettiest, or the most space efficient, but it’s my favorite. I worry about things and the Feedback Sports Wall Rack 2D has a simplicity to it that helps me feel like it’s secure bike storage. Just setting a bike on top of something doesn’t feel risky. As a reviewer it’s also nice to be able to constantly adjust it for different bike shapes.

If I had a bigger house, with more wall space, I’d definitely have more of these. If that’s you, you’ll have to decide if that fits with your design sensibilities but I’m here to help. I’m in the bikes are art camp so feel free to reference my voice when making your case.
More details are available on the Feedback Sports website.
4) Same complicated-ness

Steadyrack Classic Rack
As much as I love the Feedback sports stand, it’s not the most space efficient design for a bunch of bikes. It gets them off the floor and you can fit maybe two between the floor and ceiling of most rooms. There’s a way to get more in a smaller space though, vertical hanging.
ADVERTISEMENT
That’s where a company called Steadyrack comes in. I first encountered Steadyrack at the Enve factory where they have a full wall of them. I was immediately obsessed with the ease of use and space saving. The system cradles the front tire and depending on how you mount them you can almost roll the bike into it. If you place a bunch of the racks next to each other you can flip them side to side like a coat rack.
The downside is that it’s not the cheapest option out there. To that end, I’ve tried a bunch of alternatives. If we are talking about quality brands then most of the alternatives are hook based systems. All the variations have slight differences but all work by hooking the front wheel so the tire pushes against the way and puts pressure against the hook to hold the bike.
The system works but it’s not as easy as the Steadyrack design. First you need a wheel and tire combo that’s short enough to fit. That immediately eliminates the Zipp 303 XPLR wheels with a 45mm tire. Once you’ve passed that hurdle though, the real issue is needing to align the wheel to protect the spokes.
While holding a bike up off the ground, you need to position the hook in the right spot. Too far in either direction and the weight of the bike will rest on the spoke instead of the rim. That seems like a bad idea.
ADVERTISEMENT
With Steadyrack all you do is place the bike into it. It’s simple but it’s worth acknowledging that there’s cheap imitations of the Steadyrack concept on Amazon. I’m not giving this a ton of attention because I’m not interested in having a bike fall off the wall. Up to you if you want to test that. Steadyrack is rock solid and easy to use. In all the testing I’ve done over the years, it’s the best I’ve found. As you can see in the video I currently only have one installed. That’s for demonstration of the concept and I’ll be adding a second one, plus installing the lower piece, as soon as possible.
More information on the Steadrack website.
5) May need permit

Keter Newton Plus 7.5’x13’
Now we are going to get kind of radical. Most of the time, when looking for bike secure bike storage, people aren’t considering a project of this magnitude. That’s because a quality shed could easily be a $10,000 investment. Keter changes that calculation and makes it worth considering if you’ve got the space.
The shed I have is 7.5’x13’ but that’s only a matter of what works in my space. The brand has a lot of other shapes and sizes.
Just to be clear, this is not a cheap option but in the scheme of outdoor sheds of this size it’s a crazy bargain. It’s one of those options you see in Home Depot and think can’t possibly be any good. Having tried it, it’s definitely worth thinking about.
ADVERTISEMENT
Keter sells direct as well as through Home Depot and it comes to your house as a flatpack of corrugated plastic pieces. Think of it like cardboard but made with plastic. The roof is more solid but plastic also and there’s a metal frame that holds it all together. Floor pieces are included as well but before you start assembly, you need a foundation.

You could probably manage with gravel or sand but I started assembly by pouring a slab. Once that was done it took me about two solid days of your typical Ikea style instructions to arrive at a complete shed. None of it’s hard but it requires two people and more patience than my wife and I have.
In the end, we didn’t get divorced and we managed to build a shed that stands up to wind and rain and probably some snow too. It’s been through the worst of winter now and it’s been bone dry with even the heaviest rain Portland has managed. I still had to solve the bike storage piece though.
Saris Universal Bike Trac Vertical Bike Storage

Making bike storage work inside the Keter shed is a little more difficult because the walls can’t have weight pulling against them. Not unlike carbon fiber, the material is strong in one direction but not so much in the other. That means that unlike a traditional shed you can’t just drill into the walls and mount a bike. To solve the problem I reached out to Saris.
ADVERTISEMENT
Small note, Keter now offers a wall mount bike rack that works with this shed. It wasn’t available at the time I started working on this project but Saris also has some other advantages.
On the consumer side you might think of Saris as making bike trainers, I picked Saris as one of the best smart trainers, and bike racks for cars. You might also remember Powertap. There’s more to the brand though. Saris makes infrastructure level products that typically end up on city streets or in the bike rooms of major developments and that’s why I reached out.
Initially I’d planned the kind of bike hoops you find on the street. It was Saris that actually suggested a different route that was able to fit more bikes. Having learned about this option, I’m now happy to recommend the Saris Universal Bike Trac Vertical Bike Storage if you find yourself needing to mount bikes in a shed.

The advantage of the Saris modular design is that it’s possible to mount them freestanding on a rack as I’ve done. You could also mount them directly on a wall if that’s possible in your situation. Either way though, it’s a hook based system with a tray attached.
ADVERTISEMENT
Because the Saris uses a hook it is open to the same criticism that I mentioned above. It’s more difficult to place a bike on it and the Saris hook also lacks any kind of padding. That might not be an issue with some wheels but I opted to add pipe insulation to prevent scrapes.
More important than these small details though, the Saris system offers security. I’ll explain why that’s important in the next section.
More information about the Saris Universal Bike Trac Vertical Bike Storage
More information about the Saris Vertical Bike Rack
More information about Keter sheds
ADVERTISEMENT
6) Time for a subscription

Security is an important consideration
The last thing I want to talk about is security. A few years ago I did extensive reporting on how to keep your bike in your hands. I cut through some locks and I tried a number of electronic things but what I found most interesting was the work I did with BikeIndex.org to identify how bikes actually get stolen.
Turns out that for those with nice bikes, the number one way it happens is through a garage. These kinds of bikes don’t get locked up on street corners where people try to break locks off them. Instead they get stored in garages and that’s where they get stolen from. Your garage is not high security.
ADVERTISEMENT
If you are using a shed or garage to store your bikes each one of them should be locked independently with an angle grinder resistant lock. One of the advantages of the Saris system is that it has a place to attach a lock. Make use of it and pair it with an angle resistant lock.
Like any technology, bike thieves are more advanced than years past. While there’s still a contingent of breaker bars in use, there’s also portable angle grinders with cut off wheels. Litelok, OnGuard, and Hiplok are all good options for locks that aren’t easy to cut through. Use one per bike. This will cost money, it will cost less than a stolen bike.
On top of that you should also consider your insurance and an alarm. Homeowners and renters insurance isn’t perfectly equipped to handle expensive bikes but it can help if you shop around. Make sure your policy lists the bike separately and check how much coverage is available for a single bike. You might end up adding different insurance.
ADVERTISEMENT
I also prefer to have an alarm on top of everything else. Given the quality of locks I’m suggesting it will take time to deal with. Ultimately a thief might still manage somehow but what if there’s a blaring alarm happening concurrently? What if that alarm has a subscription connected to someone who will answer a call when it’s set off?
More Information on the Hiplok D1000, LiteLok X1, and OnGuard RockSolid

Secure bike storage wrap up
Everyone has seen the Instagram reel with a slow motion horror show of a bike falling over. Don’t be that person and while you’re at it, lock up your bikes. Most importantly though, make more room so you can have more bikes. Do I really need to say more?
I’ve covered a full range of options here with more detail in the written article. Let me know what works for you and don’t get lazy on this. It’s both important and fairly simple.