Updated September 30, 2025 11:04AM
If you buy through our links, we may earn an affiliate commission. This supports our mission to get more people active and outside.Learn about Outside Online's affiliate link policy
Velo Buyer’s Guide: Best Bike Lights — Updated September 2025
The best bike lights for seeing and being seen plus what makes them the right option for your nighttime riding.
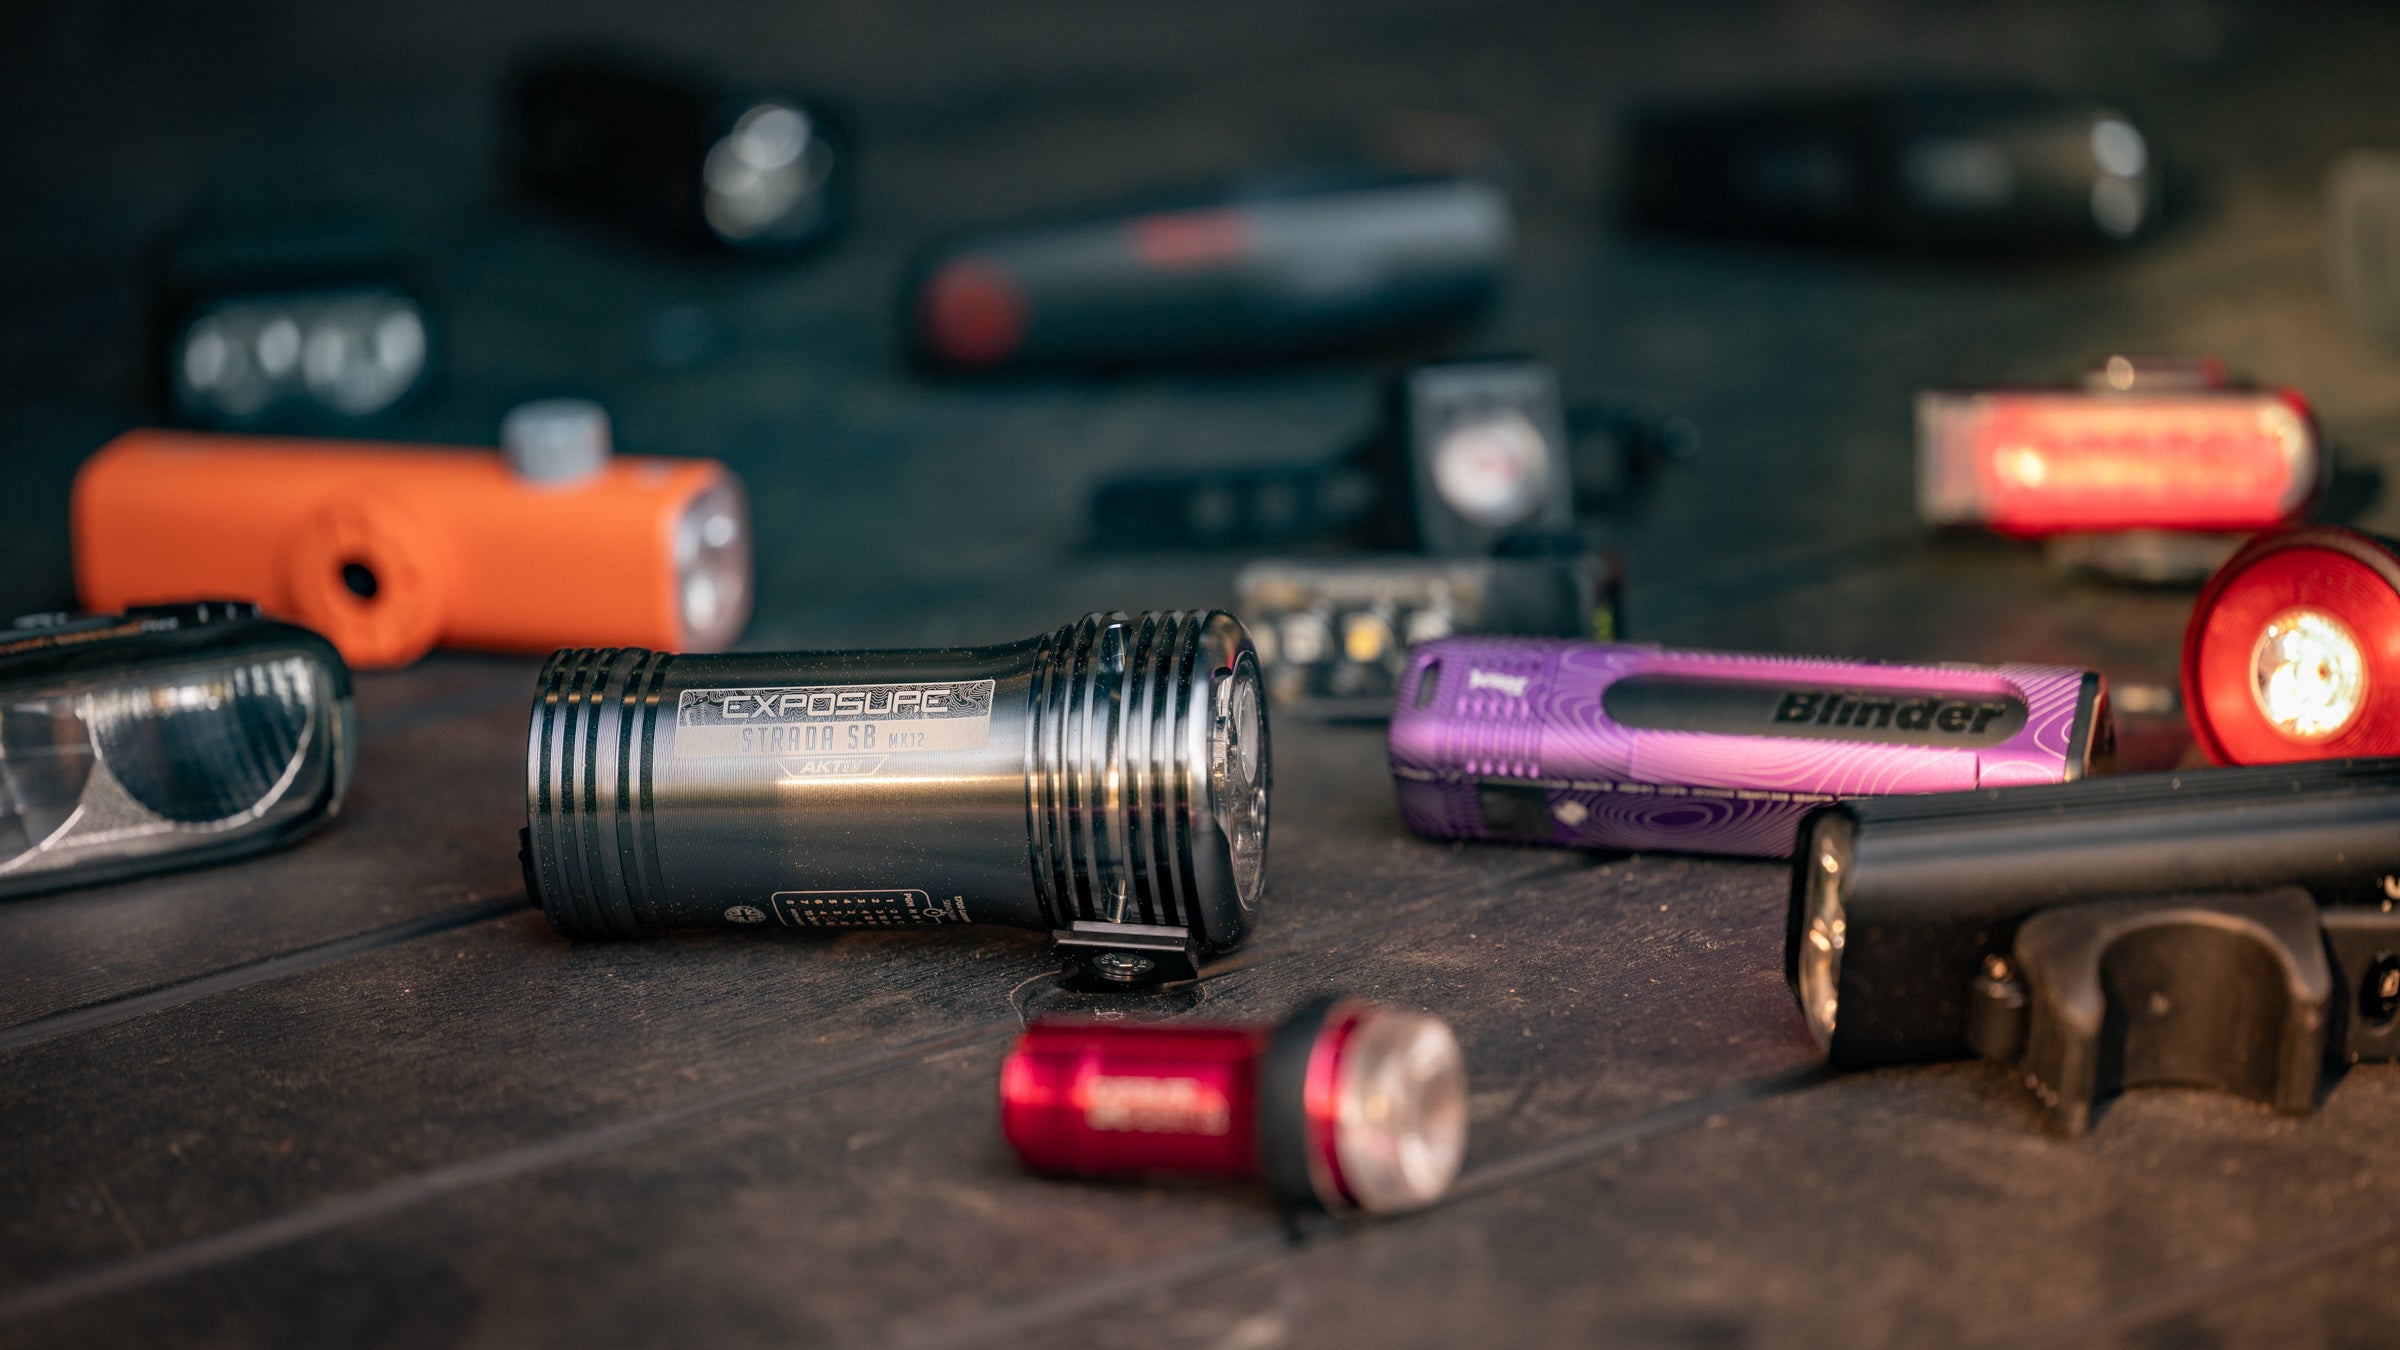
(Photo Josh Ross/Velo)
Best bike lights quicklinks
- Front Lights
- Best overall front bike light Knog Blinder 900
- Best daytime front bike light Trek Ion 100 R
- Best commuter bike light Trek Commuter Pro RT
- Best bike light for racing Exposure Lights Toro 16
- Best front camera light Garmin Varia Vue
- Rear Lights
- Best overall rear bike light SeeMee 300 Smart Tail Light
- Best daytime rear bike light Trek Flare R City
- Best ultra bright rear bike light Exposure Lights BoostR Reakt + Peloton
- Best rear radar bike light Garmin Varia RLT515
- Best rear camera light Garmin Varia RCT 715
- Accessory Lights
- Best commuter pedal Light Look GeoCity Vision Grip Pedals
- Best accessory bike light Knog Plus Rear bike light
The best bike lights keep you visible and/or able to safely see where you are riding. There are options for daytime, nighttime, gravel, fast riding, slow riding, commuting, and racing and we’ve looked at them all. After tons of research and testing we’ve pulled together a few of the lights we consider the best bike lights on the market and why we think that. Keep reading to see what might be the best choice for you.
If you are looking for information to know when shopping for the best bike lights check how to choose the best bike lights.
If you are curious about a bike light you don’t see in these recommendations jump to the other bike lights section where there’s a few additional options and information.
This is a buyer’s guide and we’ve got a whole section of Velo Buyer’s Guides to explore.
Prices updated September 2025
ADVERTISEMENT
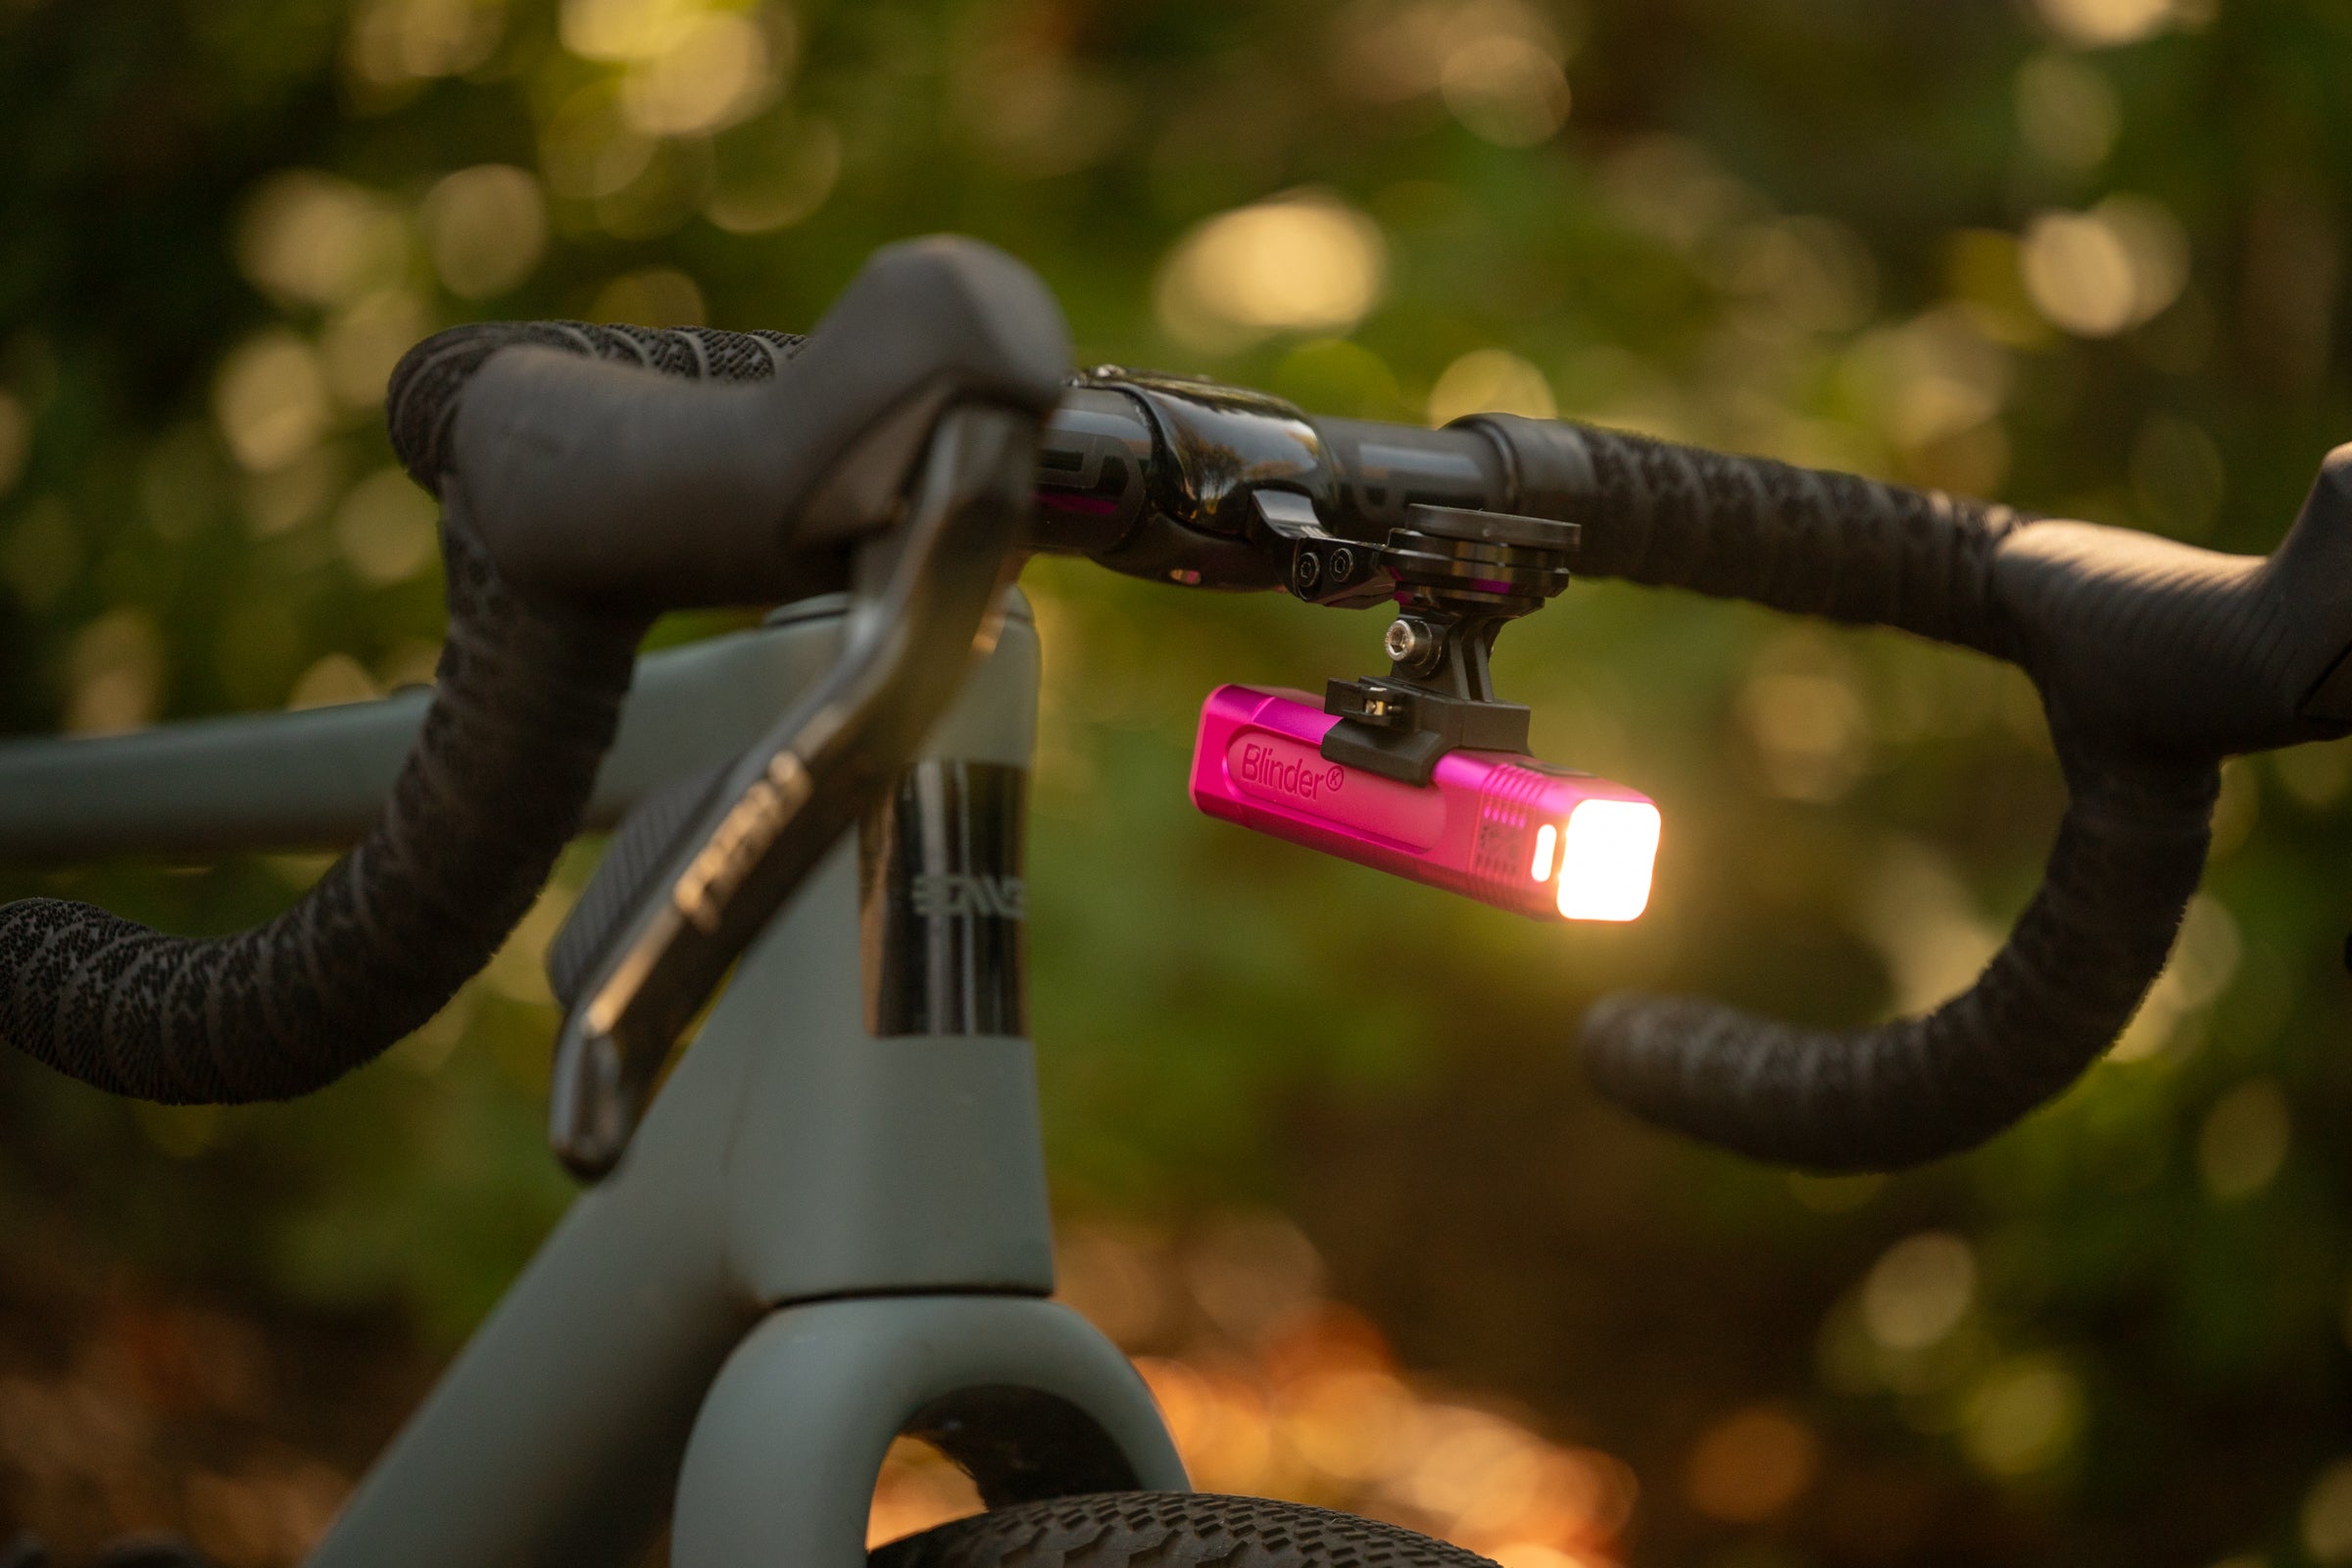
Best overall front bike light
| Model: | Knog Blinder 900 |
| Specs: | 900-lumen max output; 4-hour runtime at half power; USB-C charge port; Rubber handlebar strap mount and GoPro-style universal accessory mounts included |
| Highs: | Mounts over or under the bar in the correct orientation; Separate steady and flash cycles; Road optimized beam; Simple to use interface |
| Lows: | Long press to turn on isn’t fool proof |
For a long time, Knog’s light lineup was full of fun designs aimed at being seen rather than seeing. The Blinder series changed that with front lights for serious night riding.
ADVERTISEMENT
As soon as you touch it you’ll get a sense that this is a serious light because of the CNC metal design. That strength is then put to work by integrating the mounting system directly into the shape of the light. Rather than using an attachment, the plastic mounts clip right onto the body and click into place. You’ve got options there both action camera style or a rubber strap onto a round bar.
When it comes time to use it, there’s 6 modes. Three of those are flashing and three are solid and a single button toggles between the options for one style while a double press moves you from solid to flashing or back. The design means you’ll never accidentally plunge into darkness as you go through the modes.
The one downside to this light is that the team decided not to also use a double tap to turn on the light. Although both double tap and long press are common for turning on a light, and both are fallible, I find the double tap is less likely to happen in a bag while long press might leave you with a dead light at the end of a day.
ADVERTISEMENT
When it is time to cycle through the modes, the low setting is 200 lumens, and you can get about 7-8 hours of riding in with that setting. Medium is 450 lumens for about 3.5-4 hours in that setting, while high is 900 lumens, and don’t expect to get more than 2 hours from it. Overall, this is a great spread, and the mix of narrow beam and wide beam means you don’t feel like you need as much brightness to see everything.
To check the battery, a single press of the button will illuminate it. Depending on how much burn time you’ve got it will be either red, yellow, or green. If it requires charging it’s a USB-C cable you’ll look for.
There are higher lumen lights and lights with longer burn times but the Knog Blinder 900 has a good range of features, including an excellent mounting solution, all for a good price.
Read our full Knog Blinder 900 review.
ADVERTISEMENT
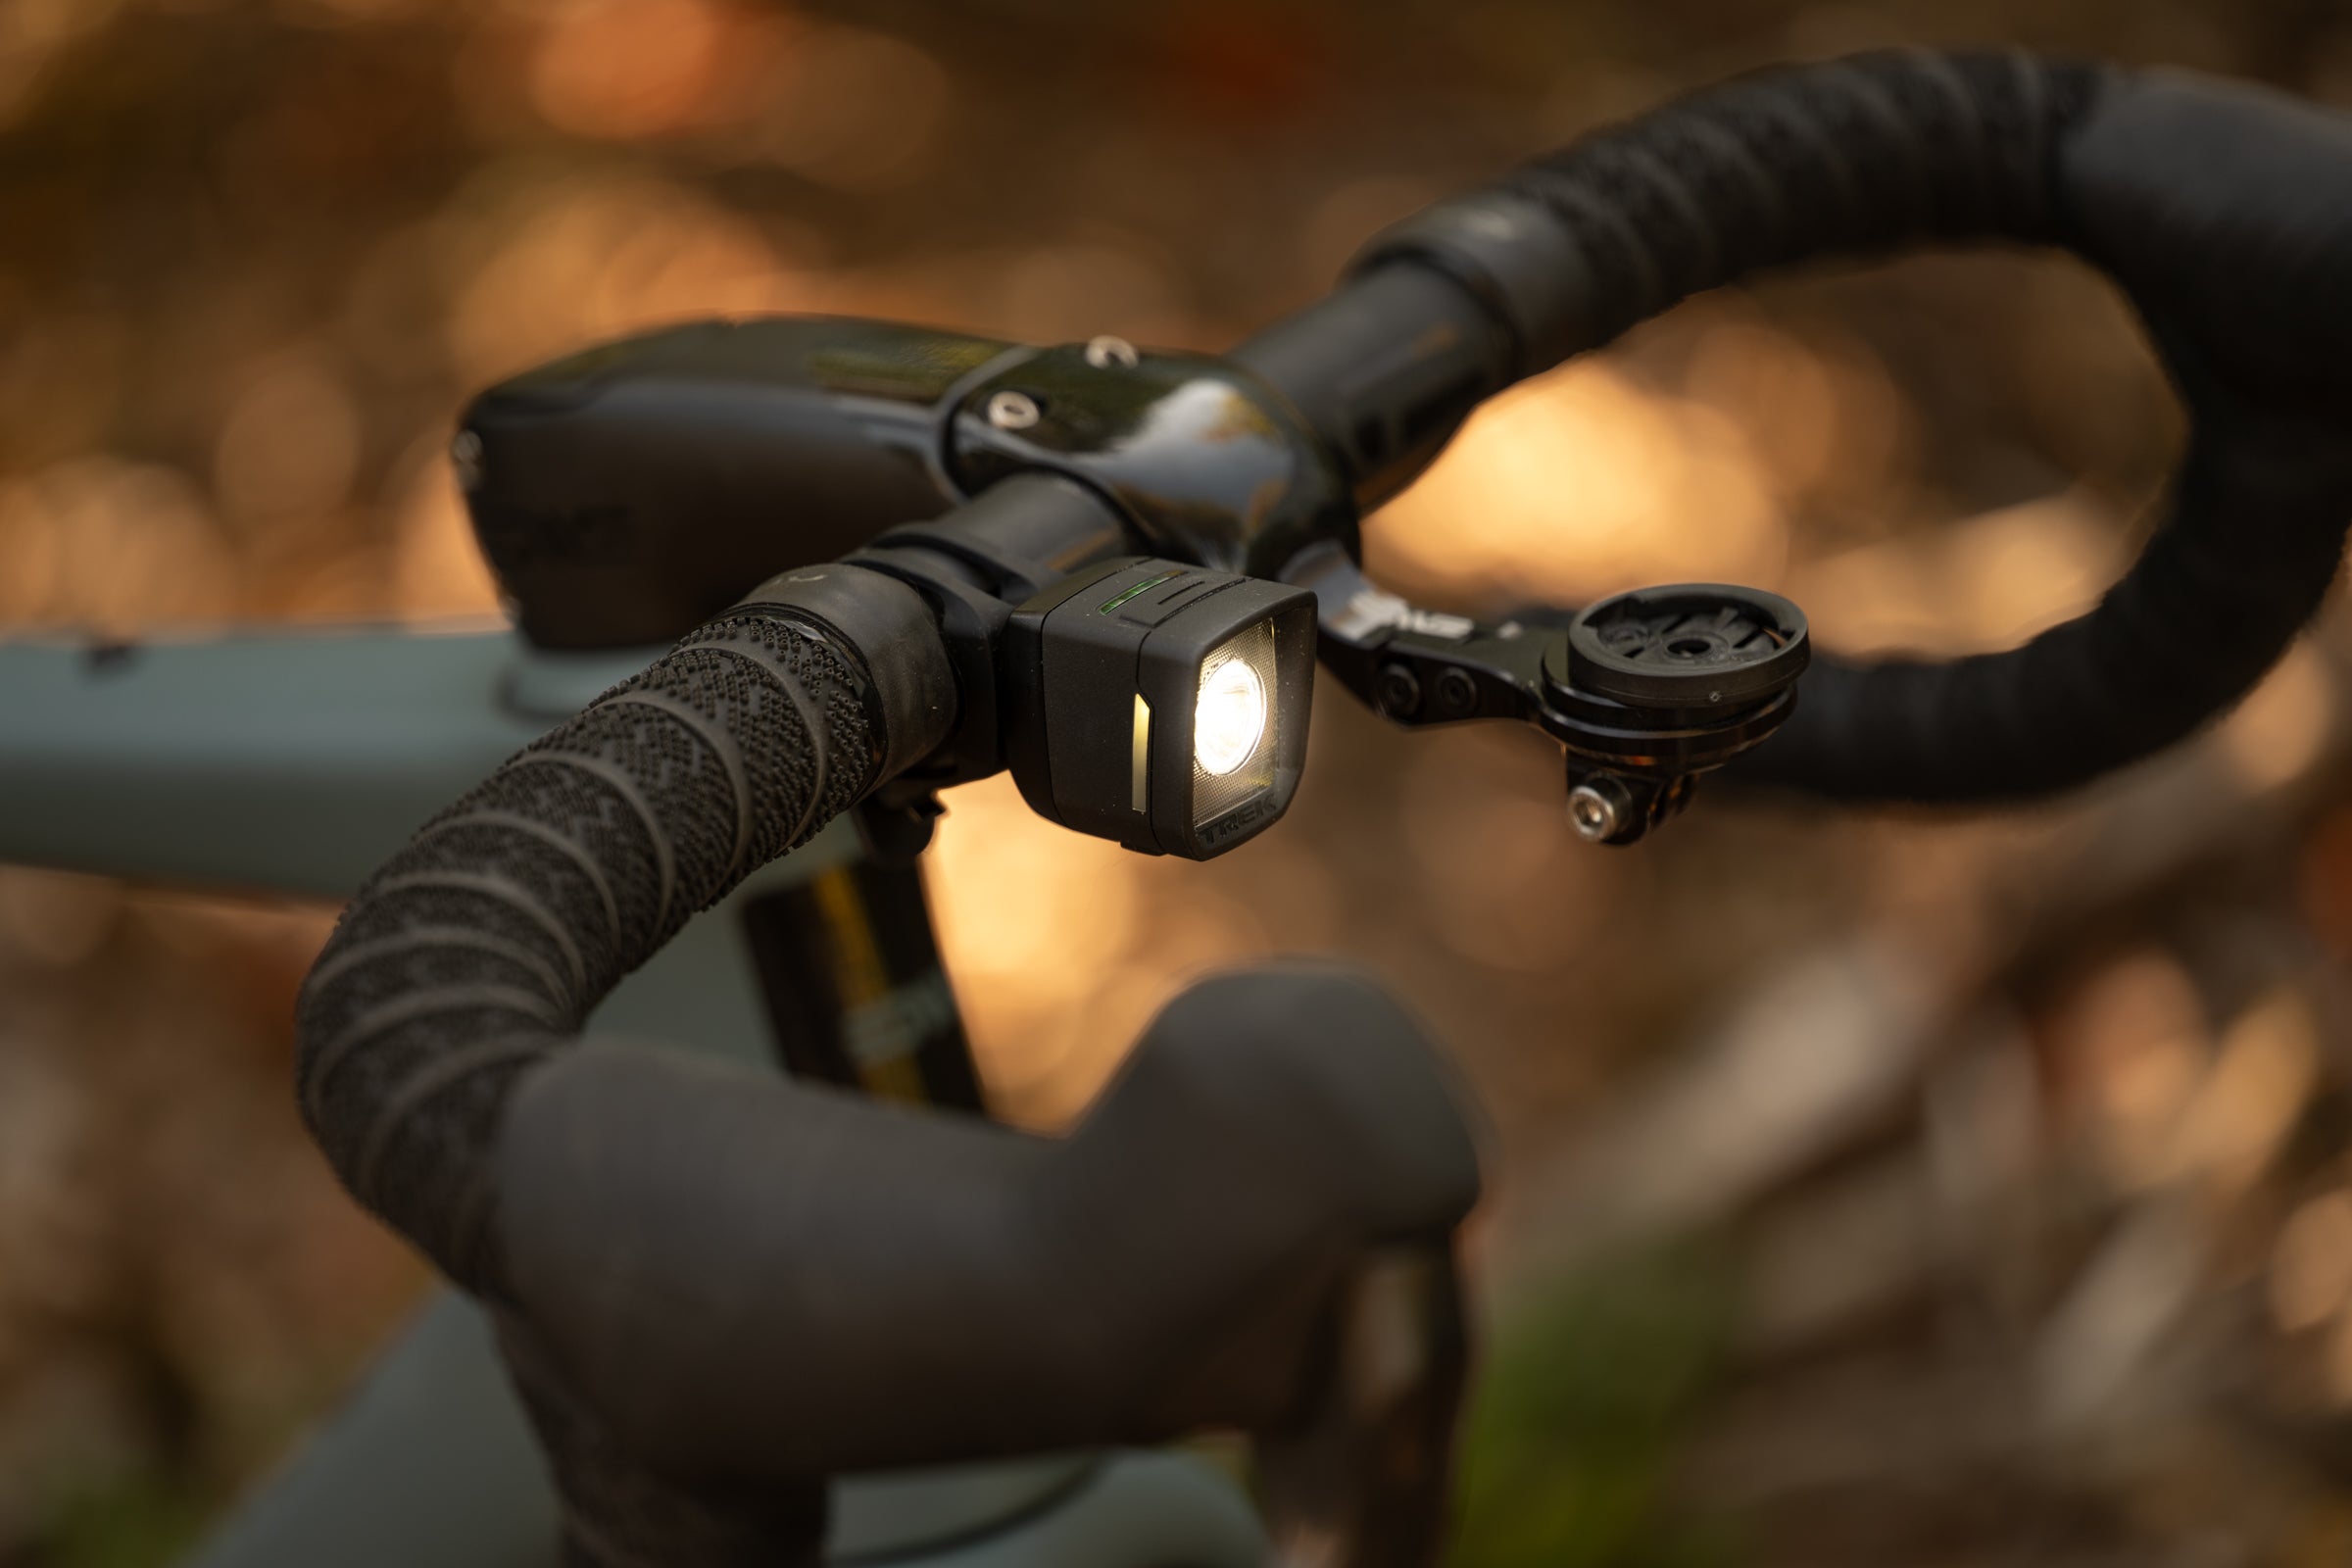
Best daytime front bike light
| Model: | Trek Ion 100 R |
| Specs: | 100-lumen max output; 9-hour runtime in daytime flash mode; USB-C charge port; Round rubber strap mount included and Trek Blendr mount compatible |
| Highs: | Small and lightweight, disruptive flash pattern, easy to check battery gauge |
| Lows: | Low max power |
Back in 2018 Trek launched a set of lights under the Bontrager name that were all about being seen during the day. There were accompanying white papers and lofty claims but the ask wasn’t a big one. The lights, both front and rear are available plus there’s a package deal, are tiny and inexpensive with easy mounting.
What was supposed to be the groundbreaking part is a combination of a highly efficient reflector and a disruptive flash pattern. Together that means the flash pattern has two parts to it and it’s claimed that it better draws the attention of motorists. That’s then combined with a reflector that makes the tiny 100 lumen light visible from 900 meters away during the brightest part of the day.
ADVERTISEMENT
Lofty claims for sure but in my experience, they ring true. Motorists seem to have better awareness when you’ve got a visible light during the day and this one is definitely visible. When my wife met me mid-day in the desert as I rode across Oregon, she immediately remarked on how far away she was able to spot me. I’ve been sold on these ever since but these aren’t exactly the same lights.
This year Trek introduced the Ion 100 R as an update. The whole concept is unchanged but the update brings modern touches such as USB-C charging and now there’s a battery gauge. Unfortunately it does downgrade from the previous generation a little bit with a move from 200 lumens to 100 lumens. Not a problem for the day flash use case but don’t depend on this one in the dark even for a brief and unexpected late return.
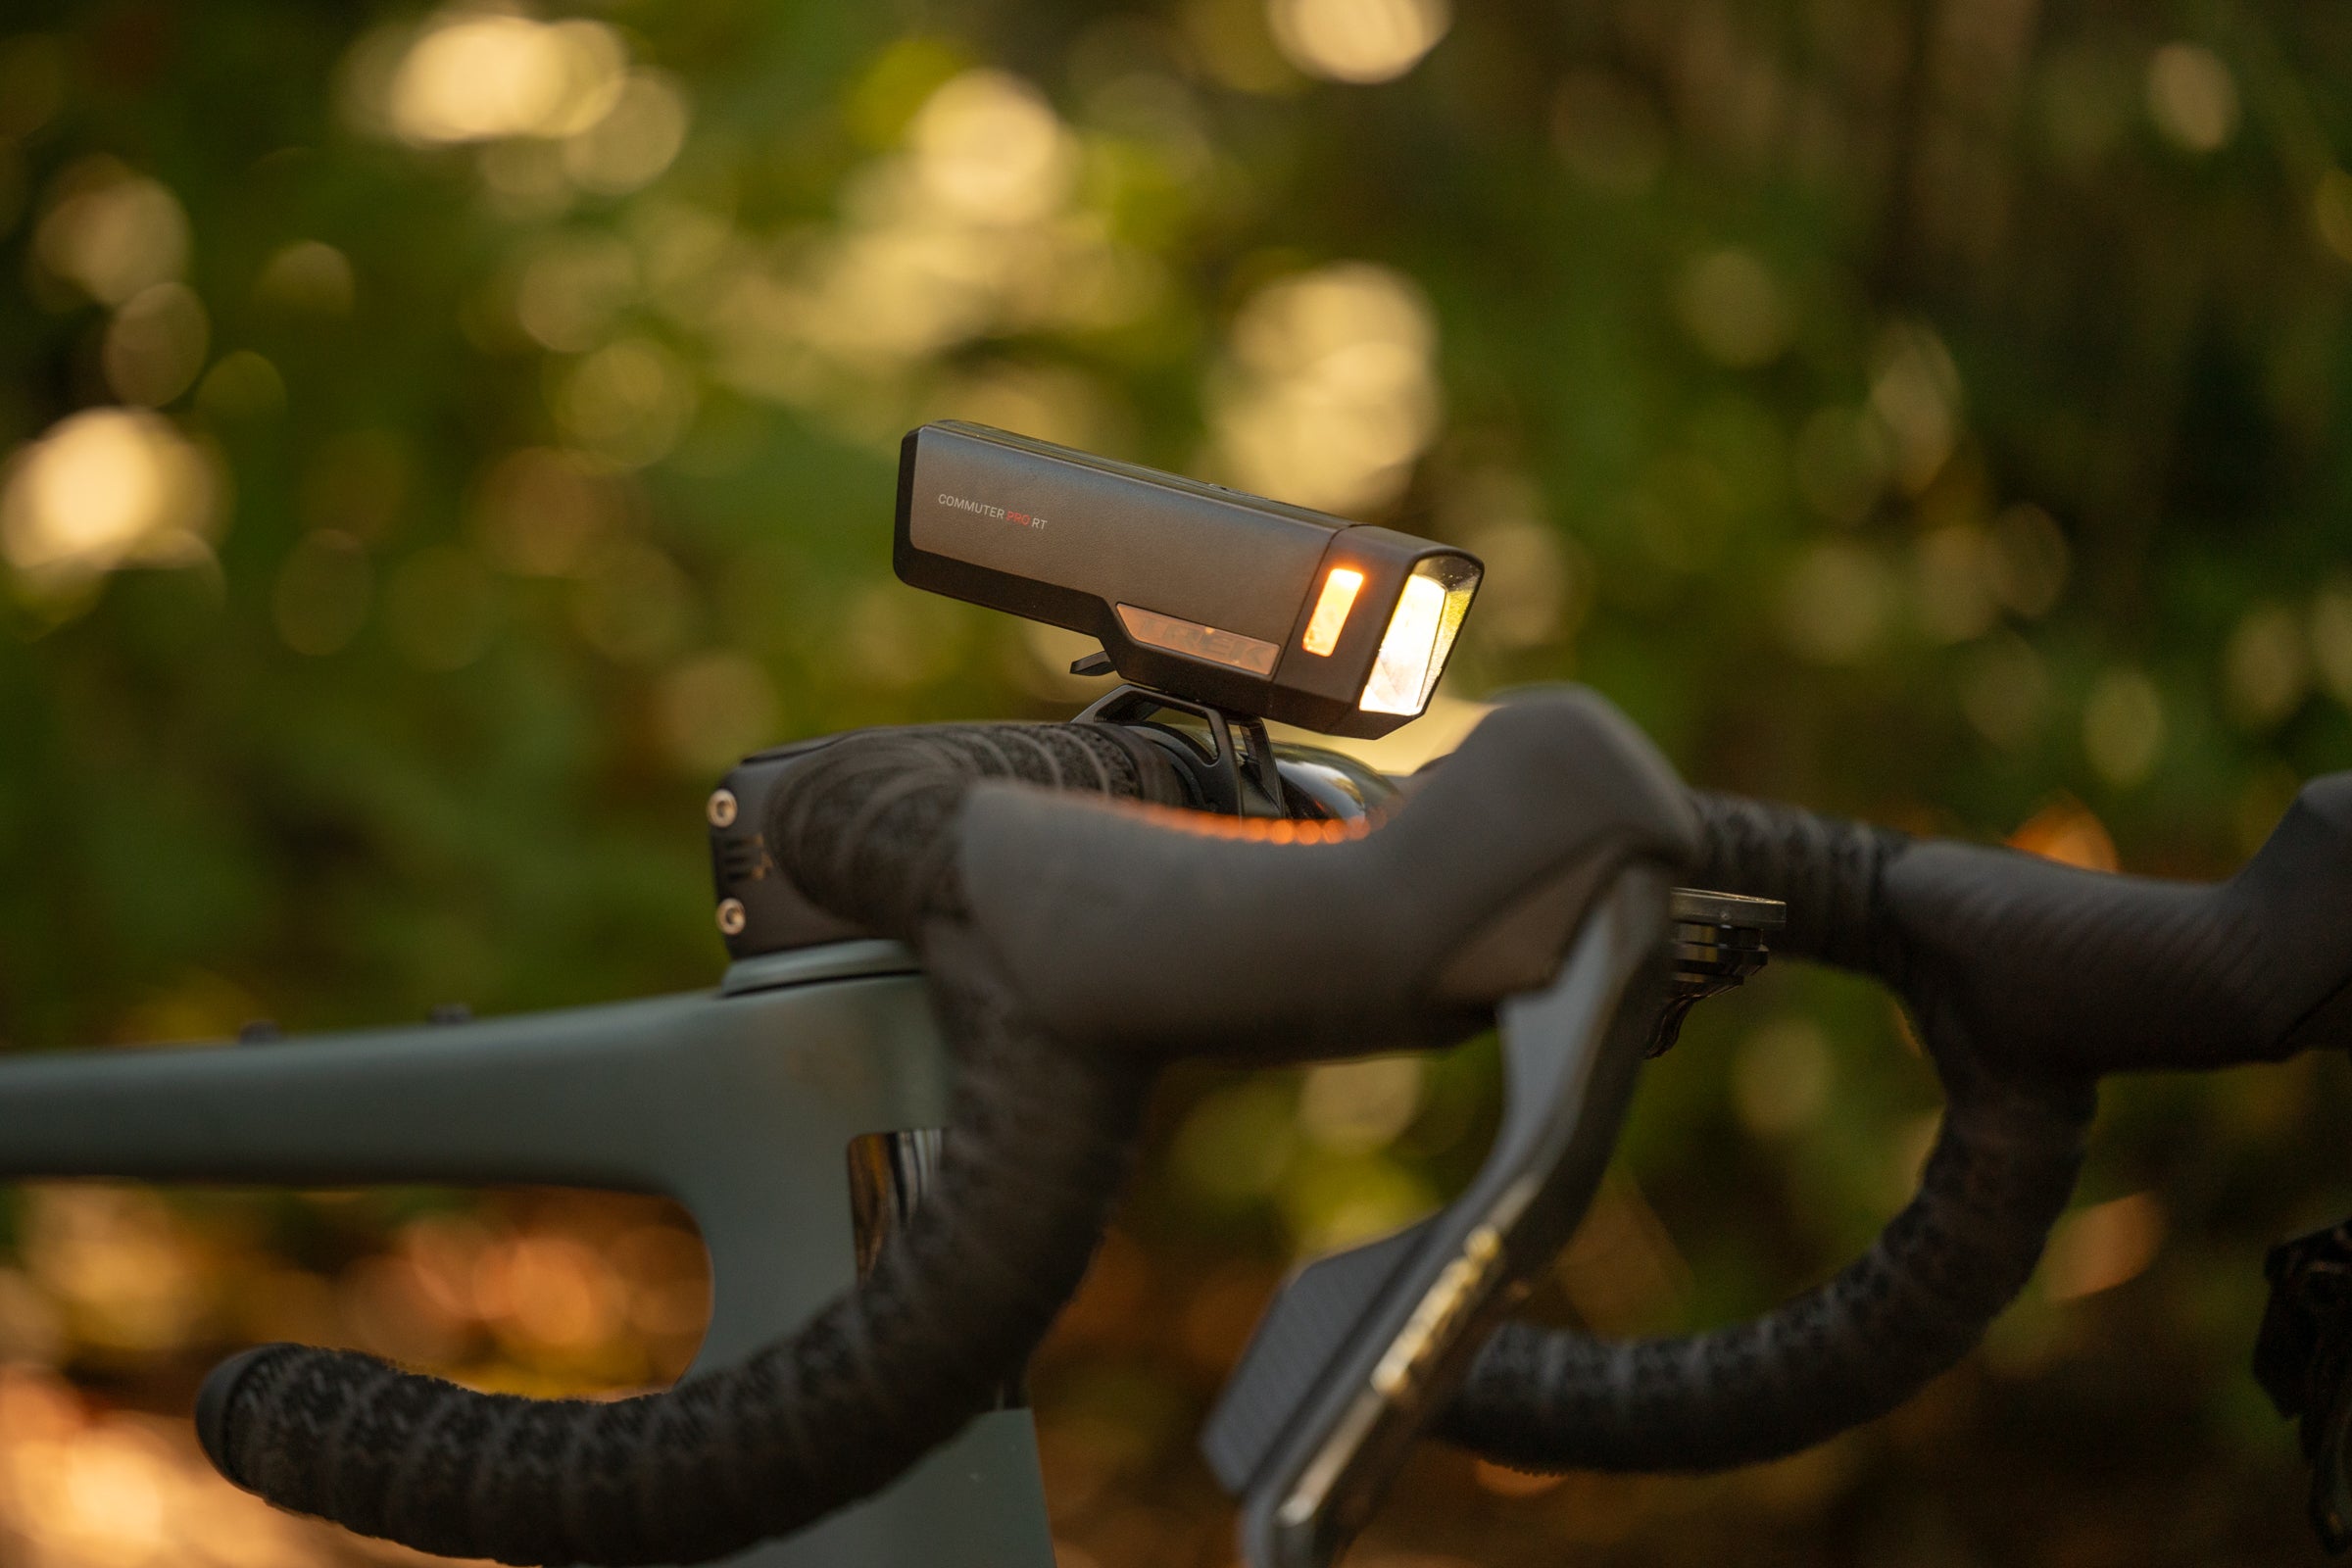
Best commuter bike light
| Model: | Trek Commuter Pro RT |
| Specs: | 1000-lumen max output; 3-hour runtime at half power; USB-C charge port; No tools required hard mount (for round bars) with quick removal and Blendr compatibility |
| Highs: | Sharp upper beam cutoff; The mounting system will work over the top of bar tape; Blendr mounting is available; USB-C charge port will charge a phone if needed |
| Lows: | Included mounting is round bar only |
The Trek Commuter Pro RT isn’t the cheapest commuter light you can find. Instead, Trek focused on making a feature rich light that will stand the test of time. The body is solid metal and should have no problem handling a drop or two.
ADVERTISEMENT
When it comes to the actual light, you’ll see more of that same thoughtfulness. Instead of a round bulb that has the potential to blind other road users, but also wastes light, the Commuter Pro RT uses a square reflector with a sharp cutoff. Because there’s less wasted light you can run the system at half power giving three-hours of battery life. You might even find yourself using the USB-C charge port to steal a bit of power for a phone given you’ve got plenty.
The one downside to the whole thing is that you can’t mount the light upside down and the included mount will only work on a round bar. Given how capable this one is you might find yourself stealing it off the commuter for an occasional recreational ride. If that happens, and you need more mounting options, you are going to have to explore Blendr solutions available as an extra purchase. On the upside if your bike does have round bars the included mount will handle going over the bar tape no problem.
Best bike light for racing
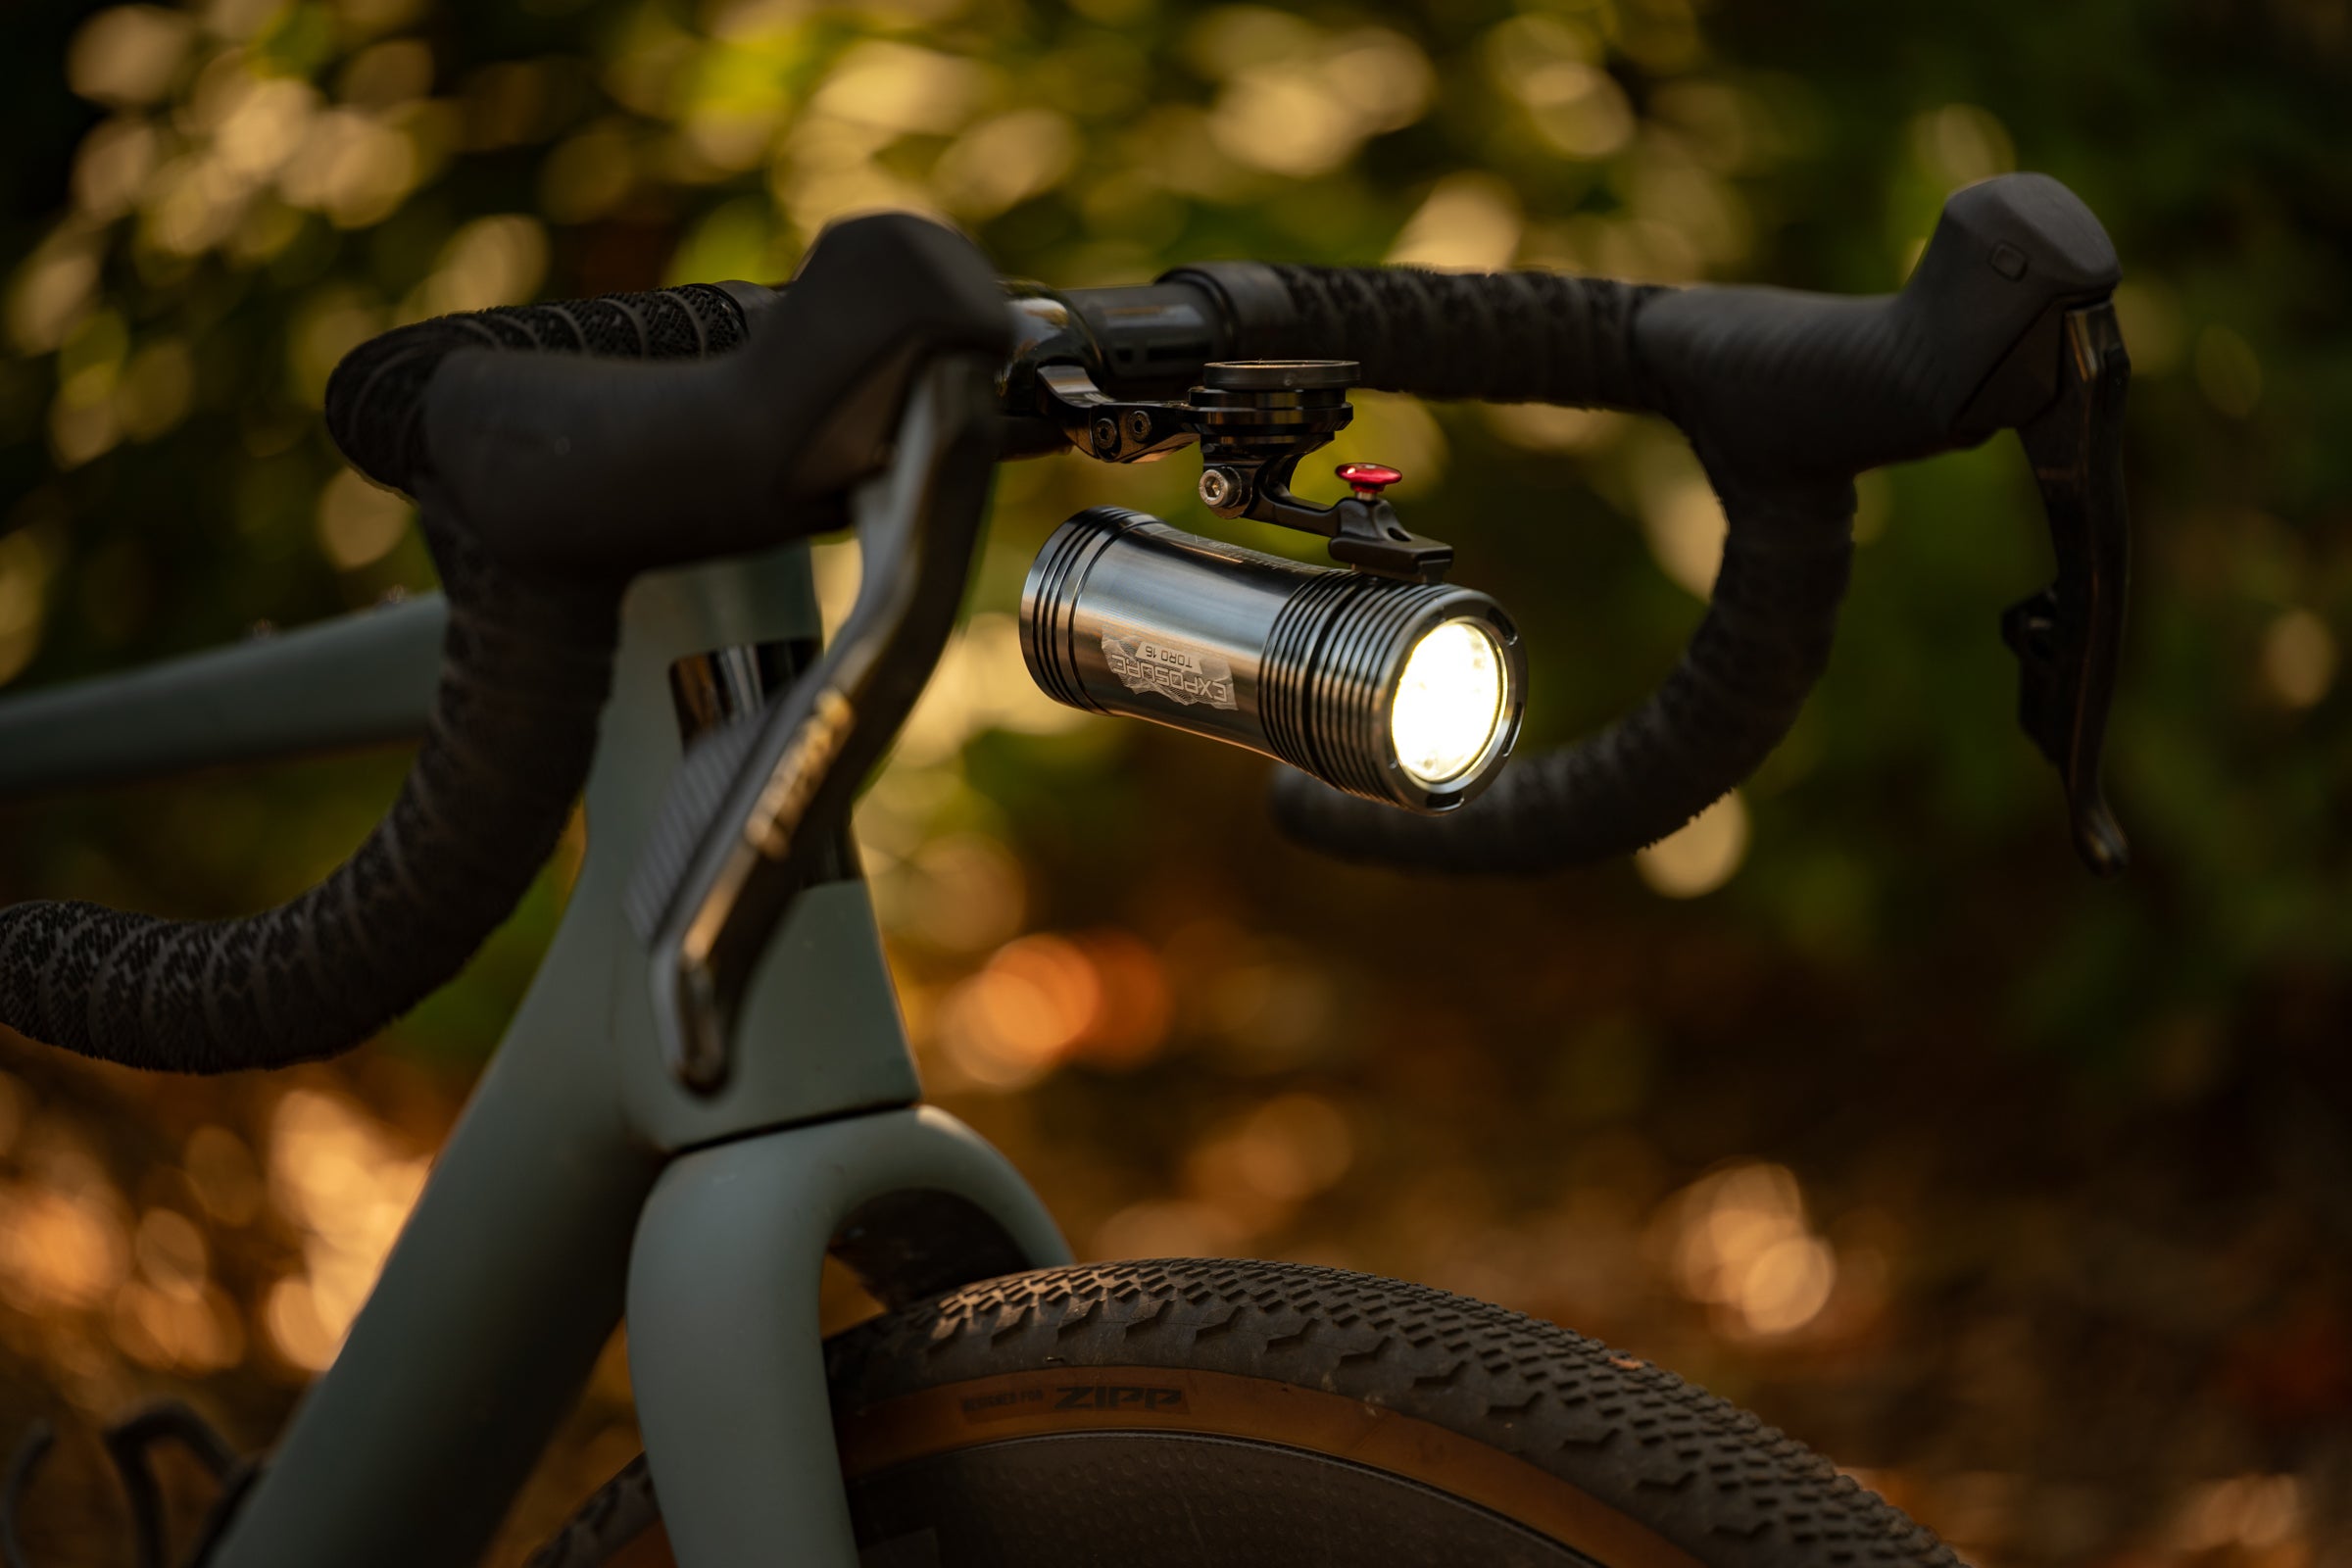
| Model: | Exposure Lights Toro 16 |
| Specs: | 3850-lumen max output; 2-hour runtime at max output; USB-C charge port; Round handlebar mount included and GoPro universal accessory mount available |
| Highs: | Incredible burn times, unrivaled build quality, OLED rear screen, power bank mode |
| Lows: | USB charge port isn’t explicitly considered sealed when charging |
Exposure Lights is synonymous with ultra endurance racing and has been for years. The light barrels are machined from solid aluminum and you could probably hammer a nail with no ill effects. Expect an unreasonable lifespan for the Toro 16 and there’s repair available if anything ever does happen.
ADVERTISEMENT
The Exposure Lights Toro 16 is different from anything before it though. In the past, Exposure Lights used a somewhat confusing system called the optimized mode selector that required math to figure out burn times vs lumens. With the introduction of the Toro 16 the best of that system remains, namely the ability to select a mode at home that offers multiple power levels and known run times, but now it’s clear how many lumens you are getting. On top of that the back of the light has a new screen with color and better information.
What that all means is that when you are pushing hard in a race in the dark you don’t have to think. At home you can look at the lumens you need then select a mode that offers that plus a few others you might need depending on conditions. During the ride turn on the light and a big bright number shows how long you have until the light goes dead. Simple and you can always select a different mode if you need to. As always the modes are printed on the light for reference.
Crucially though, the 12-hour mode offers 468 lumens which is enough to ride at speed through a full night. When the sun comes up you can plug in the light and charge via USB-C in another first for exposure. You can also use the 12,000 mAh battery for charging devices if you ever need to. Just keep in mind that the light will work while charging but there’s no official confirmation, just rumors, that you can do that in the rain.
ADVERTISEMENT
This is not a cheap light but if you need the best for an incredible adventure, this is it. You can use this to get through the night with no problem.
Best front camera light
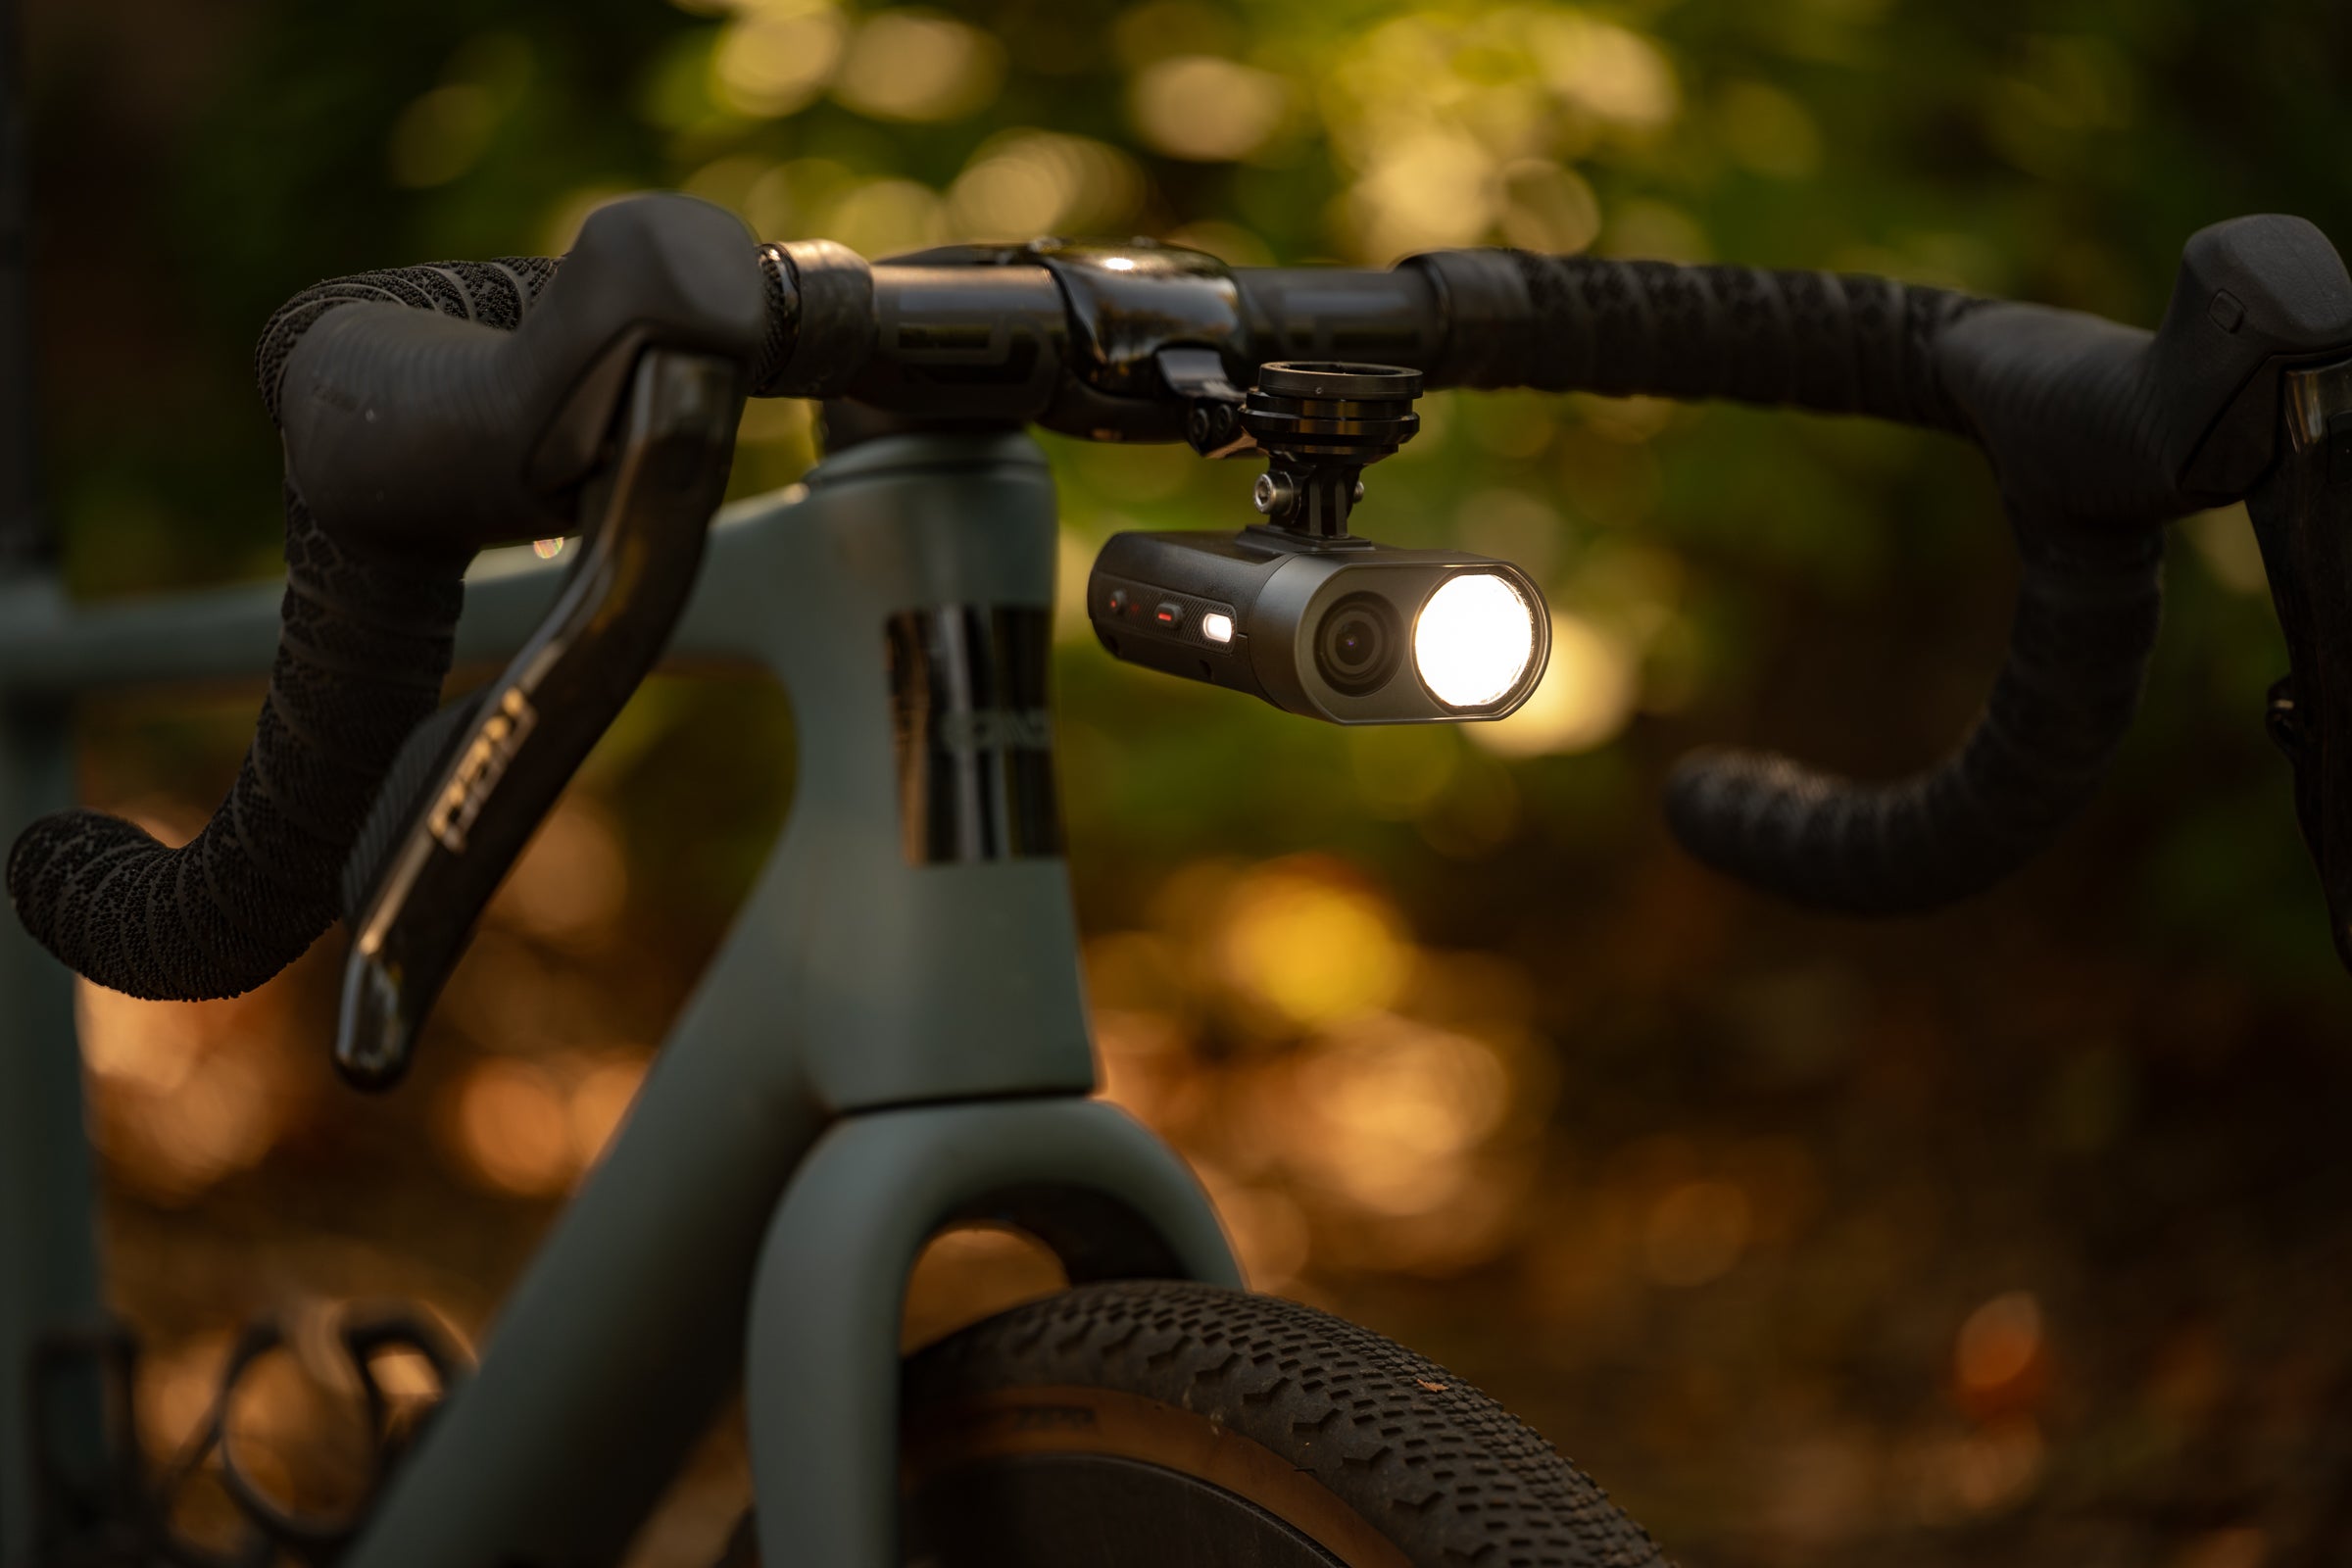
| Model: | Garmin Varia Vue |
| Specs: | 600-lumen max output; 5-hour runtime in day flash mode; USB-C charge port; Garmin outfront mount with under bar mount solution included |
| Highs: | 4k resolution; Automatic locking of footage; Up to 600 lumen light; Syncs with Garmin RCT715; Camera control through Edge bike computers; Automatic beam intensity when paired with an Edge |
| Lows: | This is a dash cam, not an action camera |
The world is a crazy place and it only seems to be getting crazier. If you are looking to not only see and be seen but also record what’s happening then the Garmin Varia Vue is your solution. There is a 600-lumen light with a burn time of 1.25-hours at full power but there’s also a 4k capable camera next to it.
That camera isn’t an action camera though. Remember that because this is not your best solution if you want to share video with friends. Instead what the Garmin Varia Vue offers is a rolling dash cam that will delete footage as needed and lock it only if there’s an incident detected.
ADVERTISEMENT
The best way to use this is during the day with a blinking light in 4k mode without stabilization. You’ll get a light that will help motorists see you plus high quality footage if they don’t and it’ll last for 5-hours.
This being a Garmin product also means, of course, that it’s part of a greater ecosystem. Connect this to a Garmin Edge headunit from out best bike computers guide and you can control it from the headunit. If you are using the light it will also adjust the power based on speed and ambient light. If you also decide to add the Varia RCT715 rear camera then everything works together seamlessly with synced front and rear video.
Read more in our full Varia Vue review.
ADVERTISEMENT
Best overall rear bike light
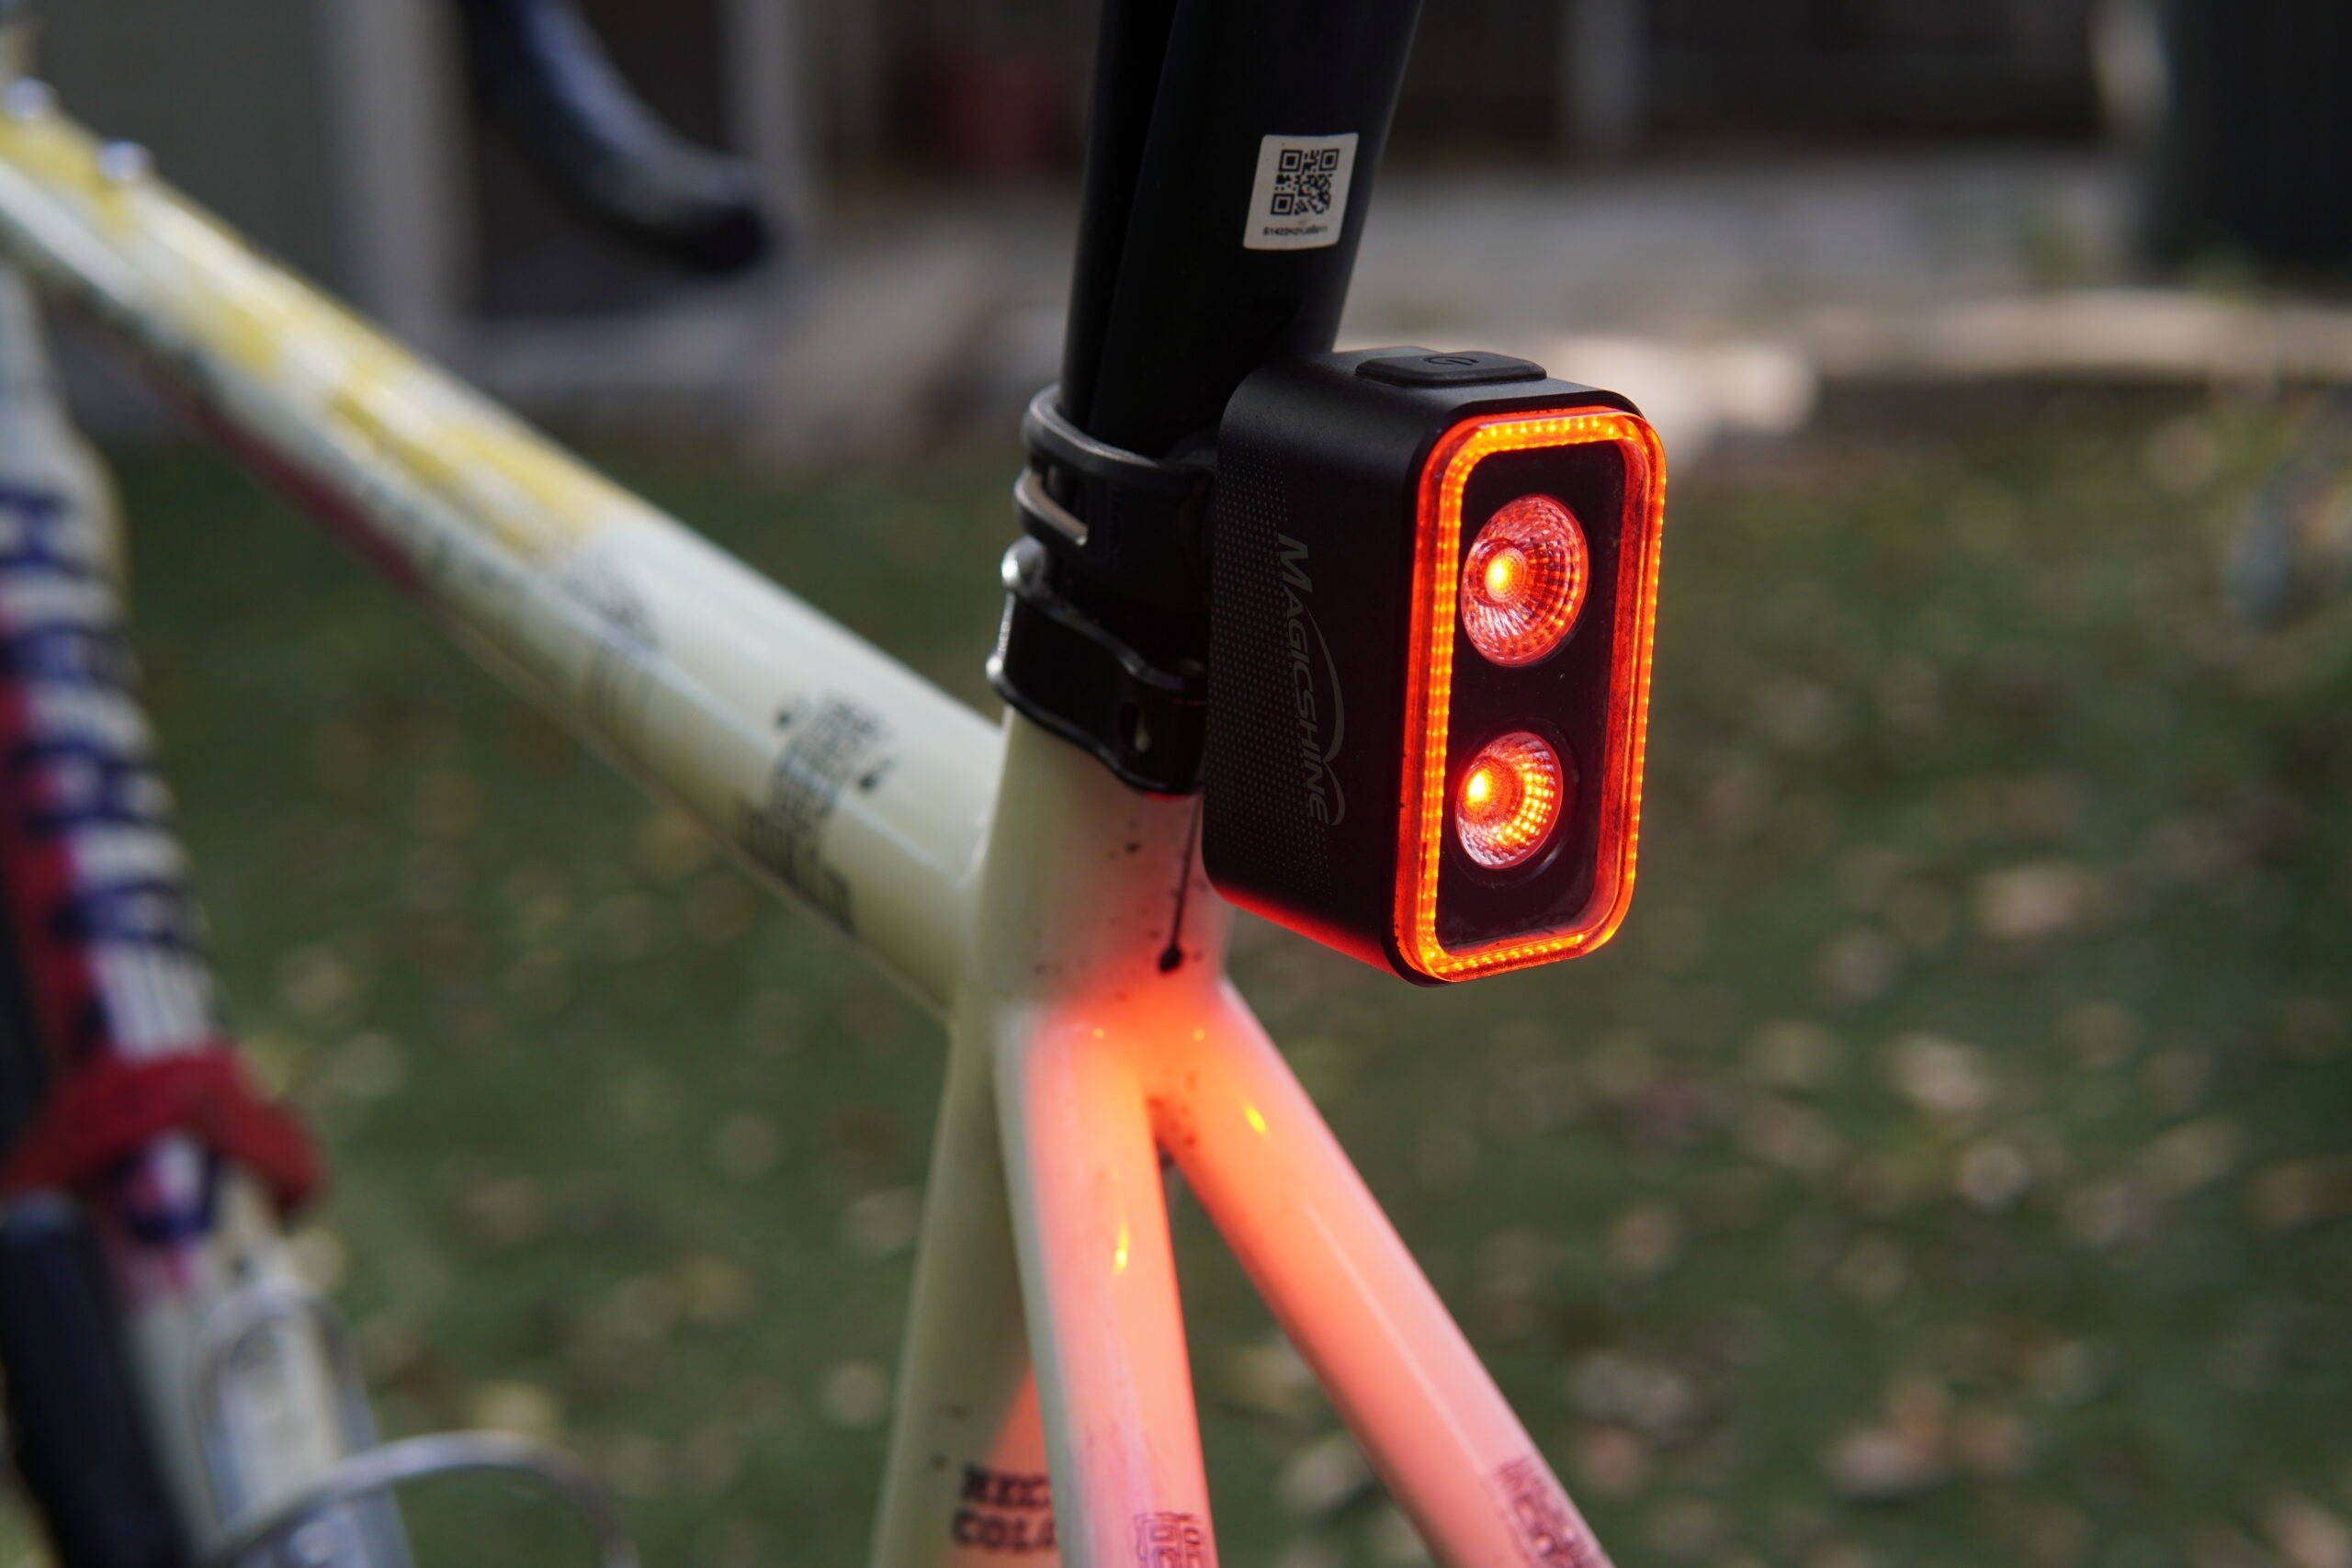
| Model: | Magicshine Seemee 300 |
| Specs: | 300-lumen max output; 6-hour run time at max power; USB-C charge port; Included band-on silicone mount |
| Highs: | Bright output even in daytime; floodlight feature adds light to your feet; long battery life; fast charging. |
| Lows: | Mount can move around on some aero seat posts. |
Magicshine is no stranger to high-power bike lights, and this updated SeeMee 300 smart rear bike light is no exception. But while many rear lights offer plenty of power to be seen at night, the reason I like this light so much comes down to the feature Magicshine calls its ‘OptiTracing Light.’
ADVERTISEMENT
The OptiTracing light is an LED mounted to the bottom of the light that is designed to light up the rear half of the bike, illuminating where you pedal. Numerous studies have shown that adding visibility to a rider’s feet–either through reflective gear or lights–reduces the risk of a driver hitting you while riding, making this feature useful in such an otherwise compact shape.
Besides that, the Seemee 300 checks all the boxes. There’s the standard steady and flash settings but there’s also a brake light function as well as ‘Smart Day’ and ‘Smart Night’ settings. Choosing these settings uses a built-in light detector to automatically adjust brightness settings as you ride along.
While this feels like too many settings to be controlled by a single button, the Seemee 300 offers a memory function too. The memory function keeps your chosen setting even when you turn the light off.
The Magicshine Seemee 300 offers a max output of 300 lumens in its ‘Smart Day’ setting and offers roughly 35 hours of battery life in my experience. Battery life does decrease when riding at night though. Expect just five and a half hours in its ‘Smart Night’ setting.
ADVERTISEMENT
This is a feature-packed light, but one with technology I truly feel improves rider visibility both in the day and night. The only downside comes in its mount, which I’ve found to move around on some–but not all–aero seat posts. – Alvin Holbrook
Best daytime rear bike light
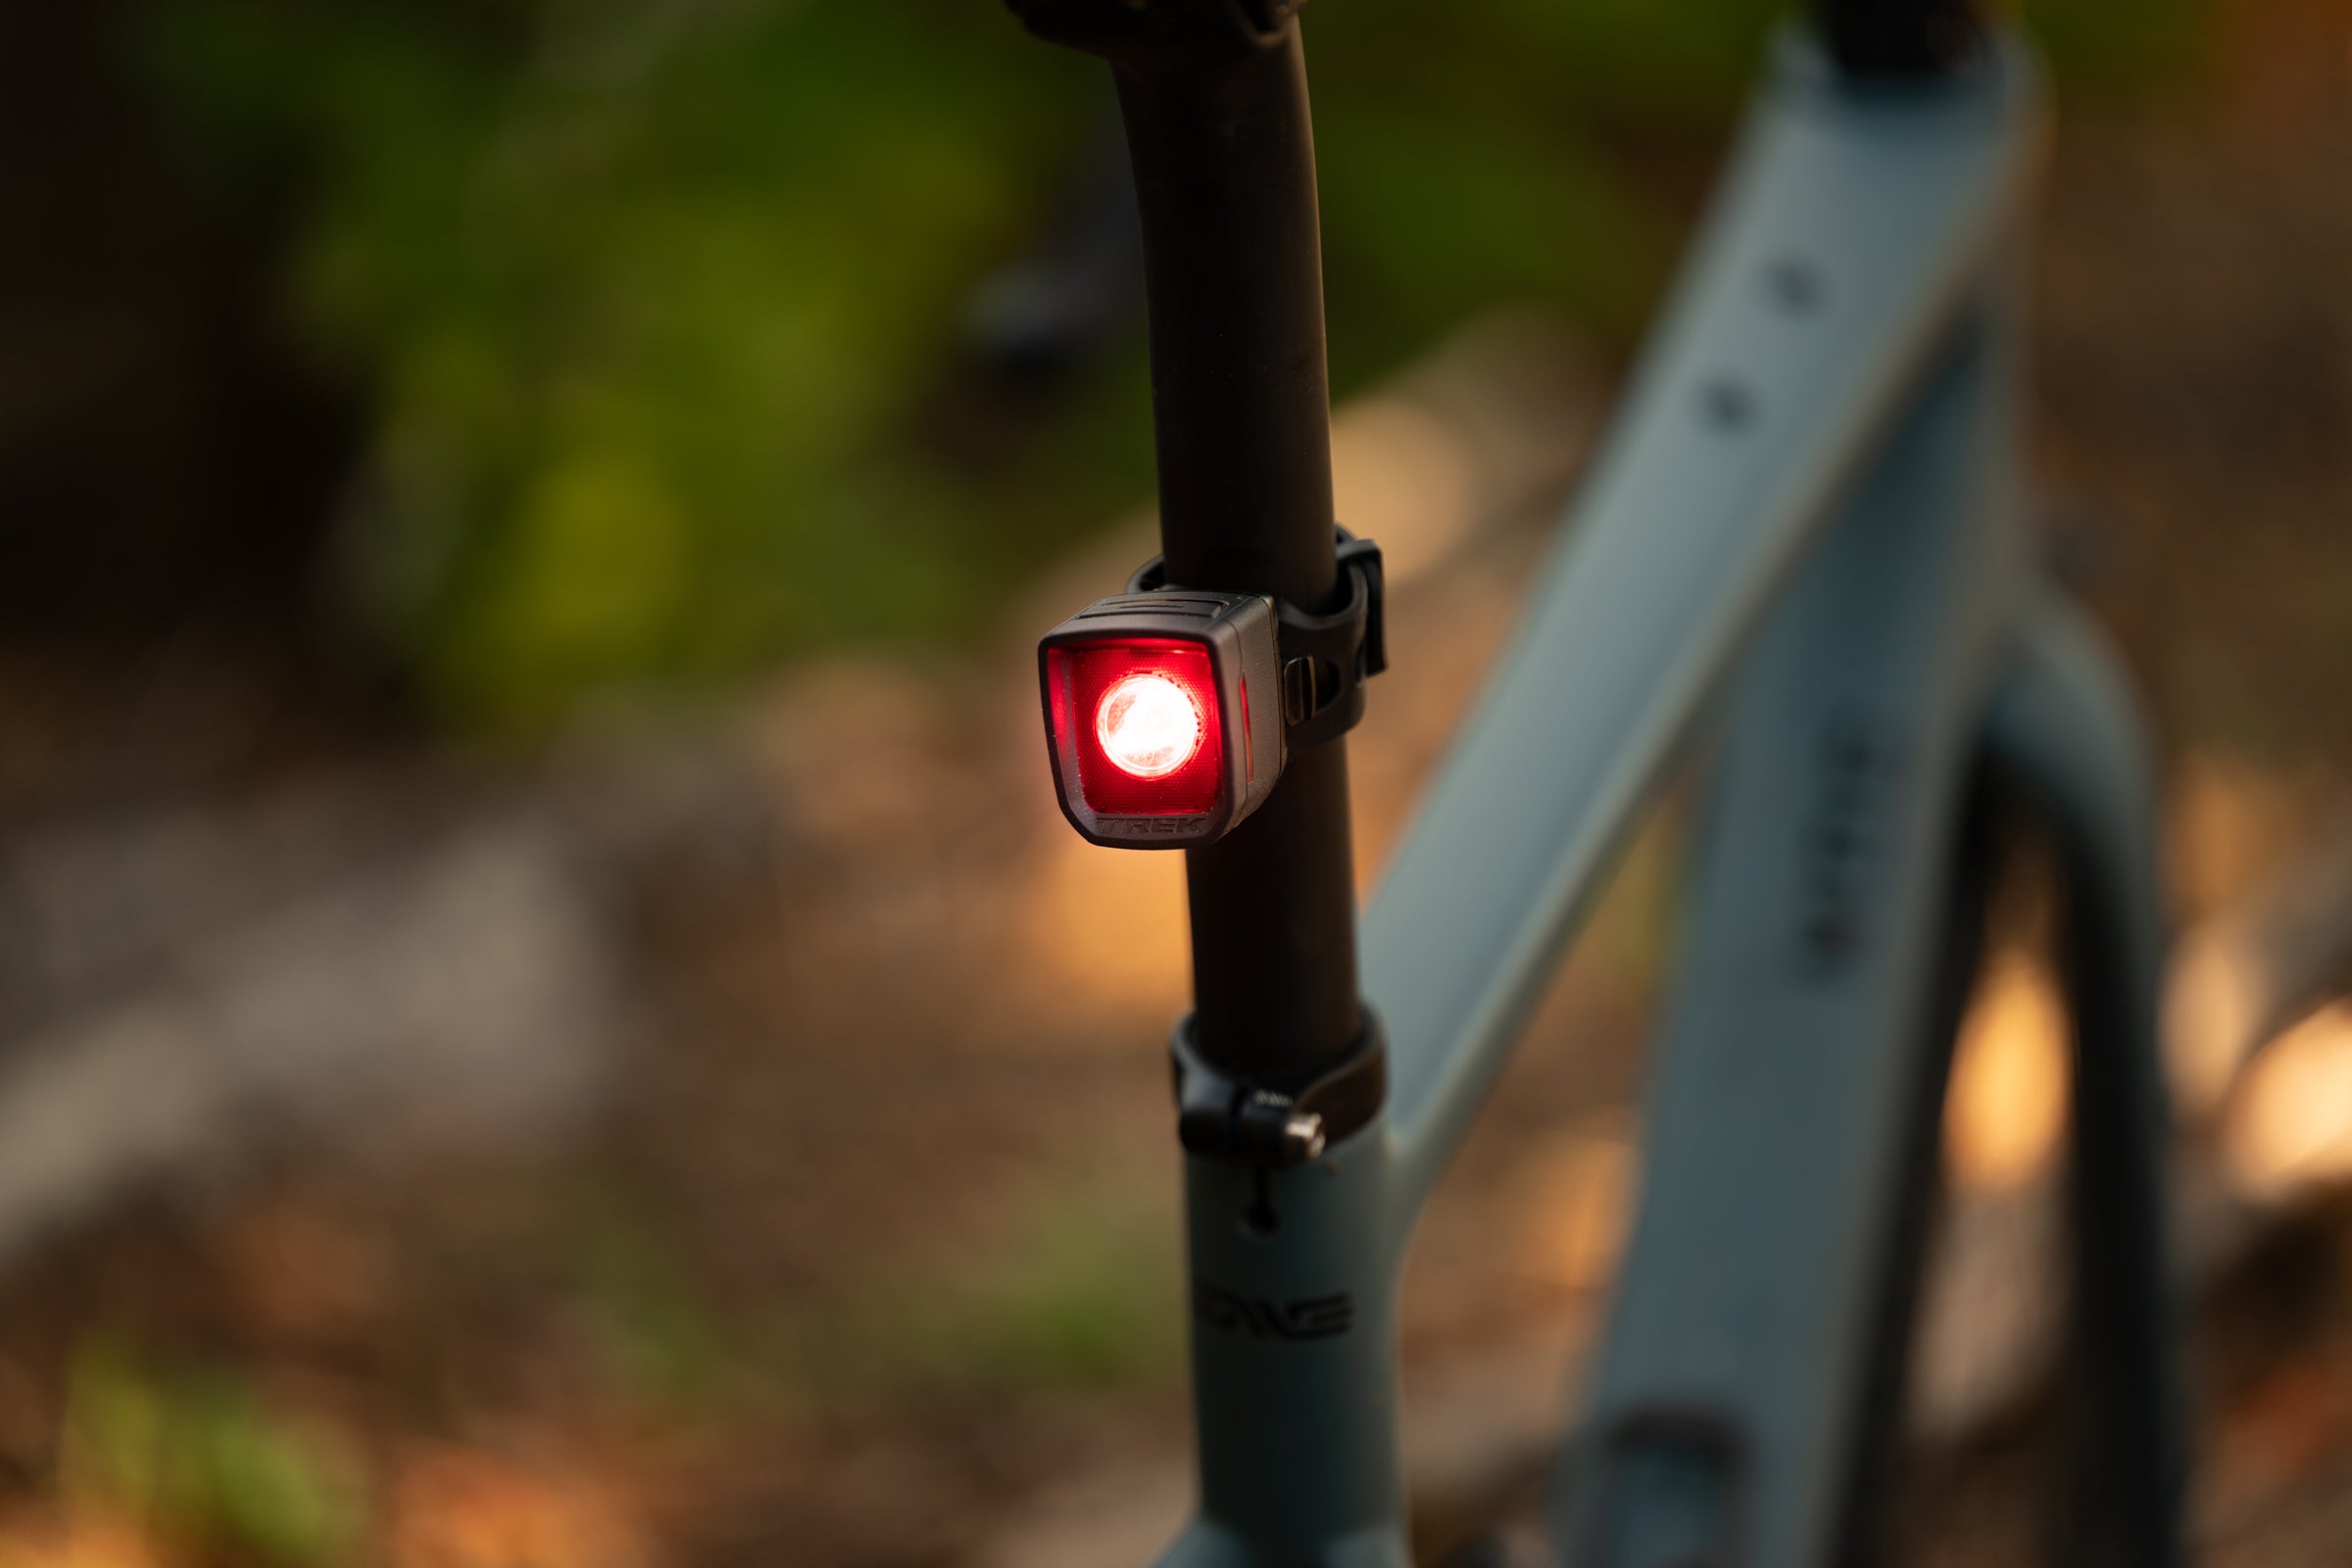
| Model: | Trek Flare R City |
| Specs: | 35-lumen max output; 10-hour run time in day flash mode; USB-C charge port; Included band-on silicone mount |
| Highs: | Small and lightweight, disruptive flash pattern, easy to check battery gauge |
| Lows: | Low max power |
This is the mirrored version of the Trek Ion 100 R up above. Just like that one this thing is absolutely tiny and incredibly visible with both a disruptive light pattern and a reflector that turns the relatively low 35-lumens into a real power house. The mounting is the same too with Blendr compatibility but also an included rubber strap. Finally, just like the front light, this one got an update this year adding USB-C charging and a quick glance fuel gauge.
ADVERTISEMENT
What’s different is that the Trek Flare R City is more versatile. I have it listed as the best daytime rear bike light because it absolutely excels in that situation. If all you want is visibility during the day then look no further. On the other hand this one is also an excellent choice for a rear light in the dark. All that impressive visibility is just as useful at night and the night flash or night steady options keep going for 24/21 hours.
If you are looking for day time visibility then there is a small savings for grabbing the package deal on both lights but otherwise this is an excellent option for both day and night and pairs well with the Trek Commuter Pro RT.
Best ultra bright rear bike light
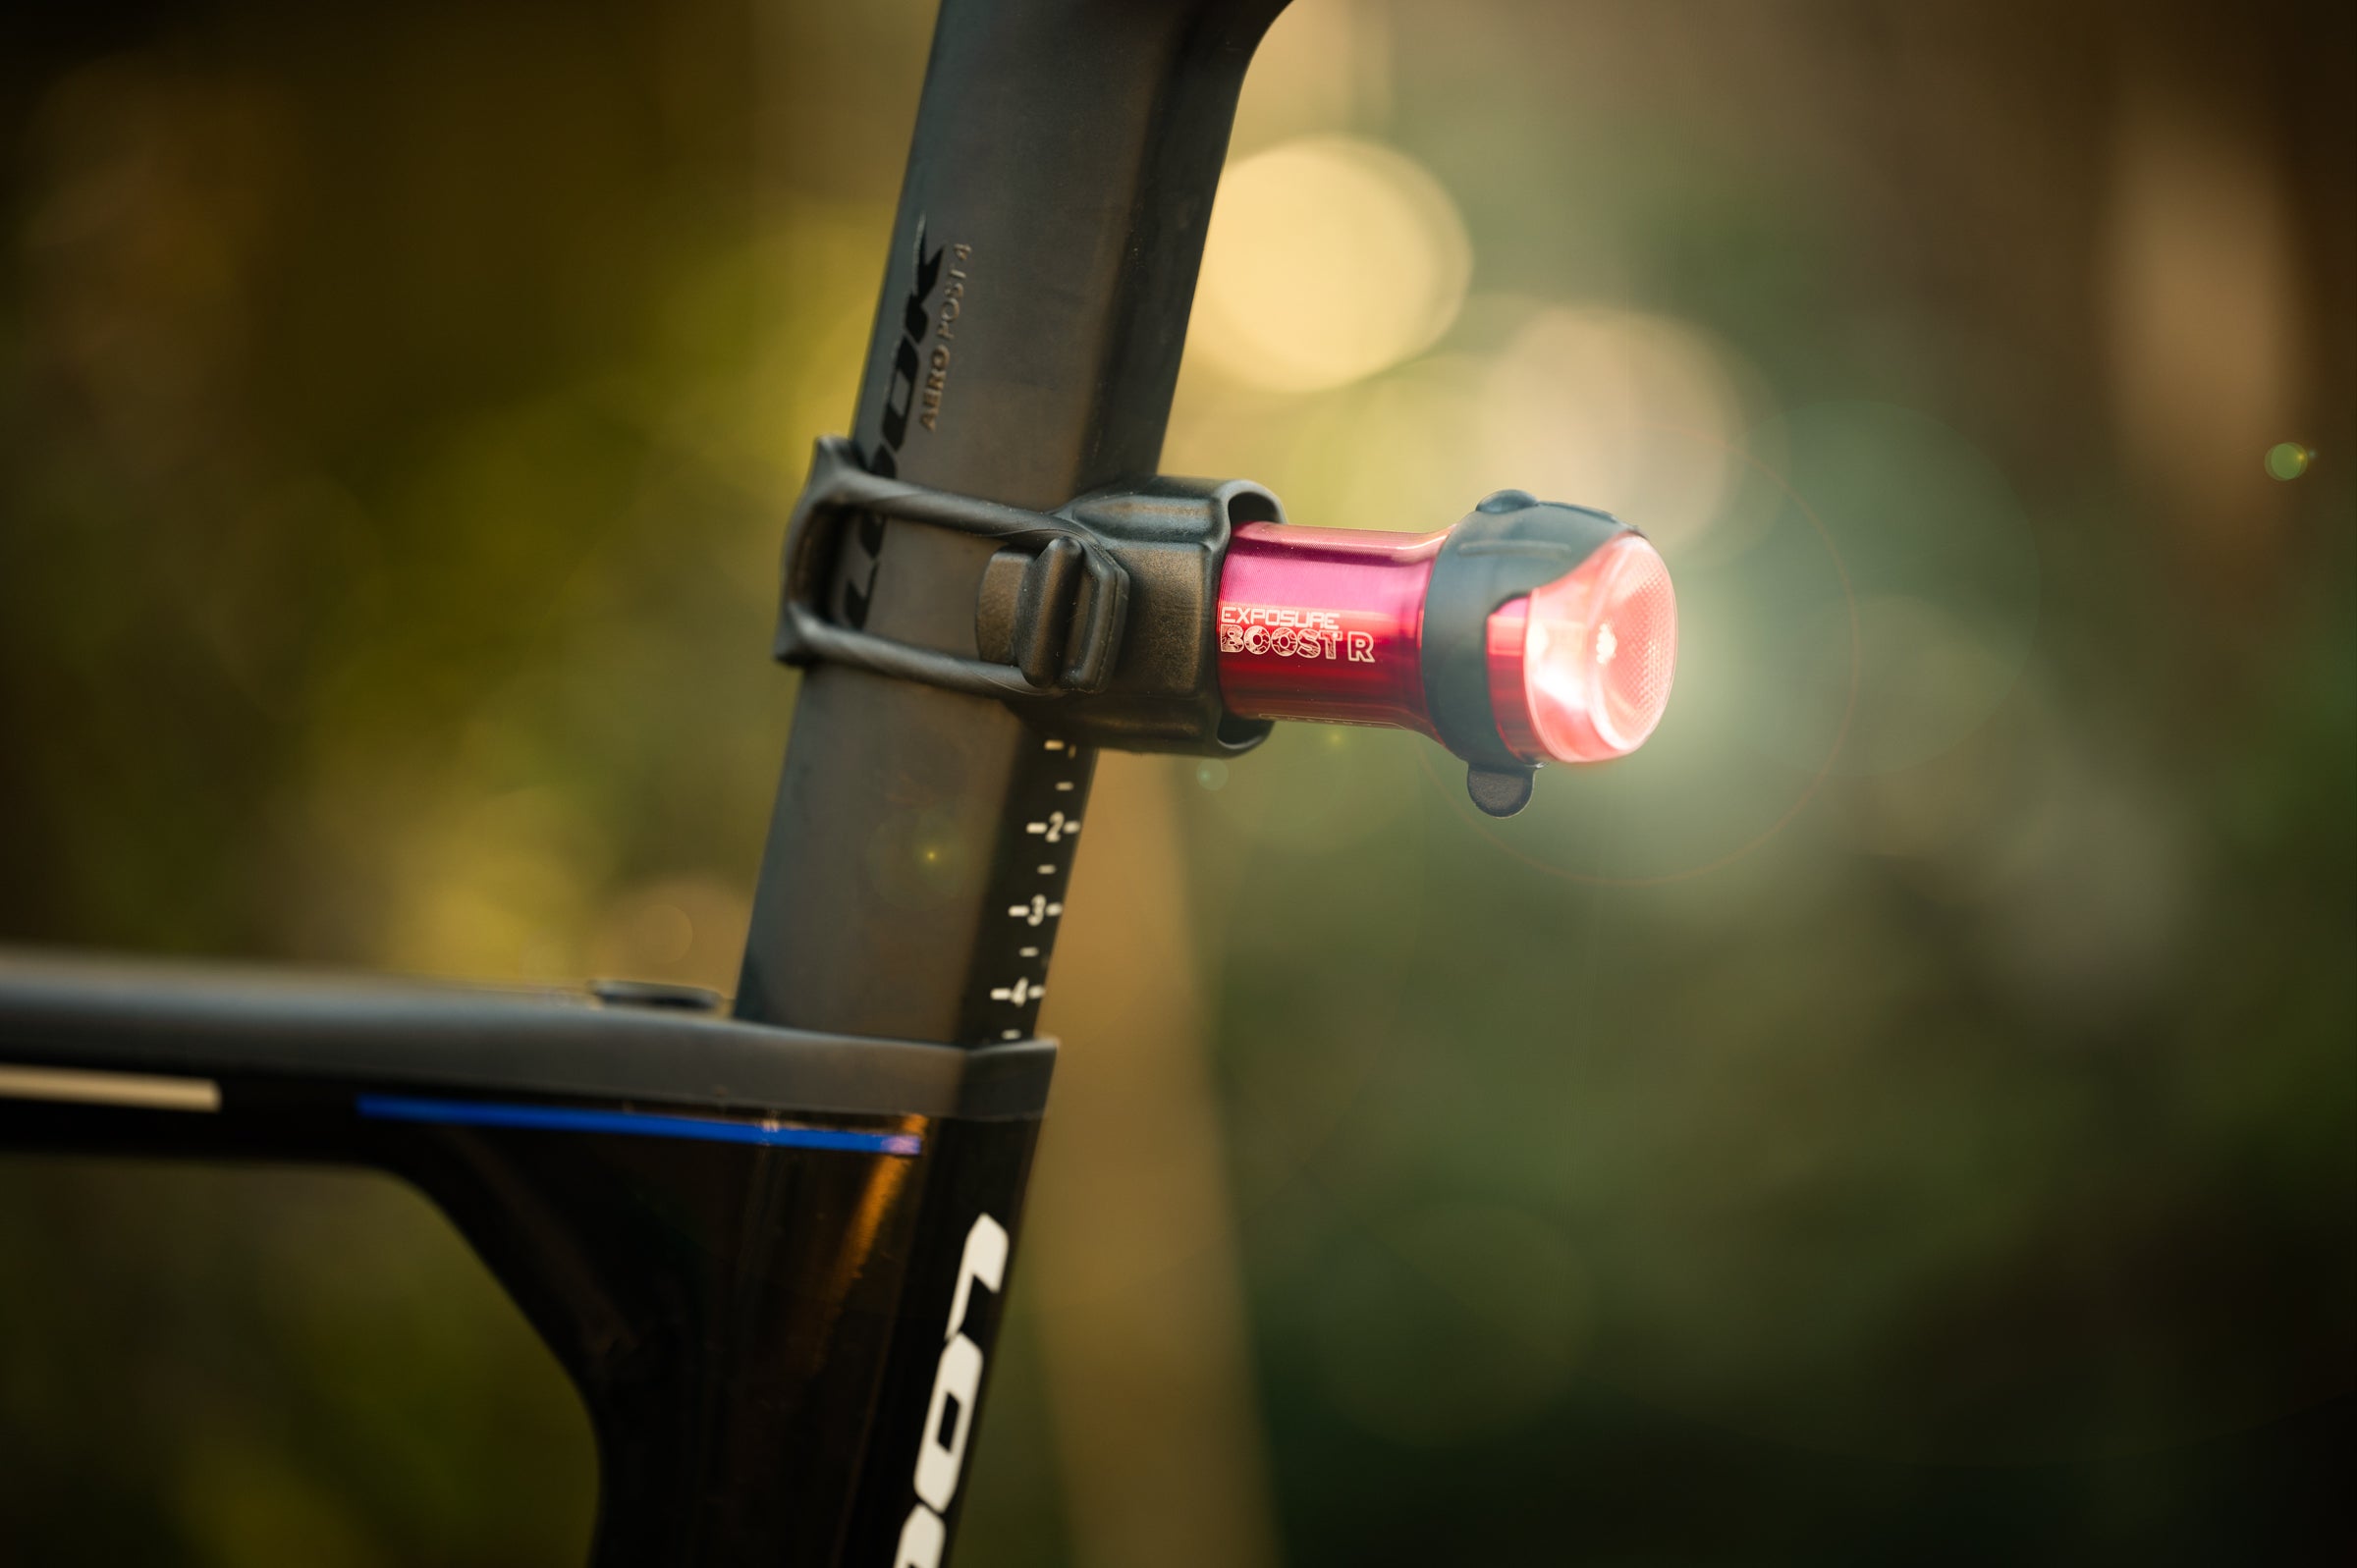
| Model: | Exposure Lights BoostR Reakt + Peloton |
| Specs: | 150-lumen max output; 12-hour run time in full power flash mode; USB-C charge port; Included band-on silicone mount |
| Highs: | Solid metal construction, disruptive flash pattern, long burn times |
| Lows: | Mode selection takes some getting used to |
I originally wanted to call out this light as the best rear bike light for riding through the night. That’s what I always use this light for because, like other Exposure Lights, it has a solid machined aluminum body and what seems like a bullet proof lens all with burns times as high as 48-hours at lower power or 12-hours at full power (in pulse mode). That crazy burn time is attention grabbing but when I started to dive into the details, it’s almost a distraction.
ADVERTISEMENT
Here’s the thing, The Boost R with Reakt + Peloton is also just an incredibly solid light that happens to have high max power and amazing burn times. There’s other lights with higher power but this one starts with a unique, and rock solid, mount plus there’s a ton of options for mounting in other ways. The Peloton feature dims when it senses a front light and the Reakt feature flares to 150 lumens during braking. It’s also got a disruptive flash pattern and it’s only 26-grams.
I know I can recommend this for anyone who wants an ultra bright option and no one is ever going to start using this then complain. The only thing I might hear about is that it does take some figuring out the mode selection when it’s new to you.
Best rear radar bike light
| Model: | Garmin Varia RLT515 |
| Specs: | 65-lumen max output; 16-hour run time in day flash mode; Micro USB charge port; Included band-on silicone mount |
| Highs: | Long battery life; 65-lumen light with irregular flash pattern; Varia rear-facing radar; Smart capability allows control via head unit; Garmin quarter mount |
| Lows: | Micro USB charge port |
The Garmin RTL515 isn’t new and, in some ways, it’s quite outdated. For one thing, the charging port is old enough you probably don’t even have a micro-USB cord around anymore. Despite that, it’s still the best option out there and I don’t say that lightly.
ADVERTISEMENT
I’ve tested every radar unit that comes on the market and they all fall short in some way. Trek and Wahoo both have solid, modern, options that do a good job at detecting cars but neither have the battery life and Garmin still edges out those two when it comes to detecting cars. I’ve written about this light so many times over the years but I’m doing it again because it’s still the best.
Let’s back up a bit though.
First it’s a light. As a light, it’s bright enough to keep you visible from far away even in the bright midday sun. On top of that it’s got an irregular flash pattern that helps catch the attention of drivers. Then the battery life holds up for 16-hours and even more if you turn off the light during the day via your head unit.
Why would you have a light that you turn off during the day though? The Garmin Varia RTL515 isn’t just a light. Instead it’s a radar unit with a decent light attached.
ADVERTISEMENT
The radar piece works by connecting with your headunit and alerting you to the presence of cars behind you. You can have it make a noise or just leave it as a graphic on your headunit but either way it’s accurate enough that I use it as a mirror. It never misses cars and you can always know, even if you aren’t paying attention or can’t look behind you, if there’s a vehicle back there.
Then, what really makes the Garmin version sticky is the mount. The Garmin quarter turn mount is ubiquitous and that means there’s always a mount for whatever need you have. Whatever weird mounting solution you want, someone is selling it either on Etsy or Amazon.
The Varia RLT515 desperately needs an update but for now it’s still the best on the market.
ADVERTISEMENT
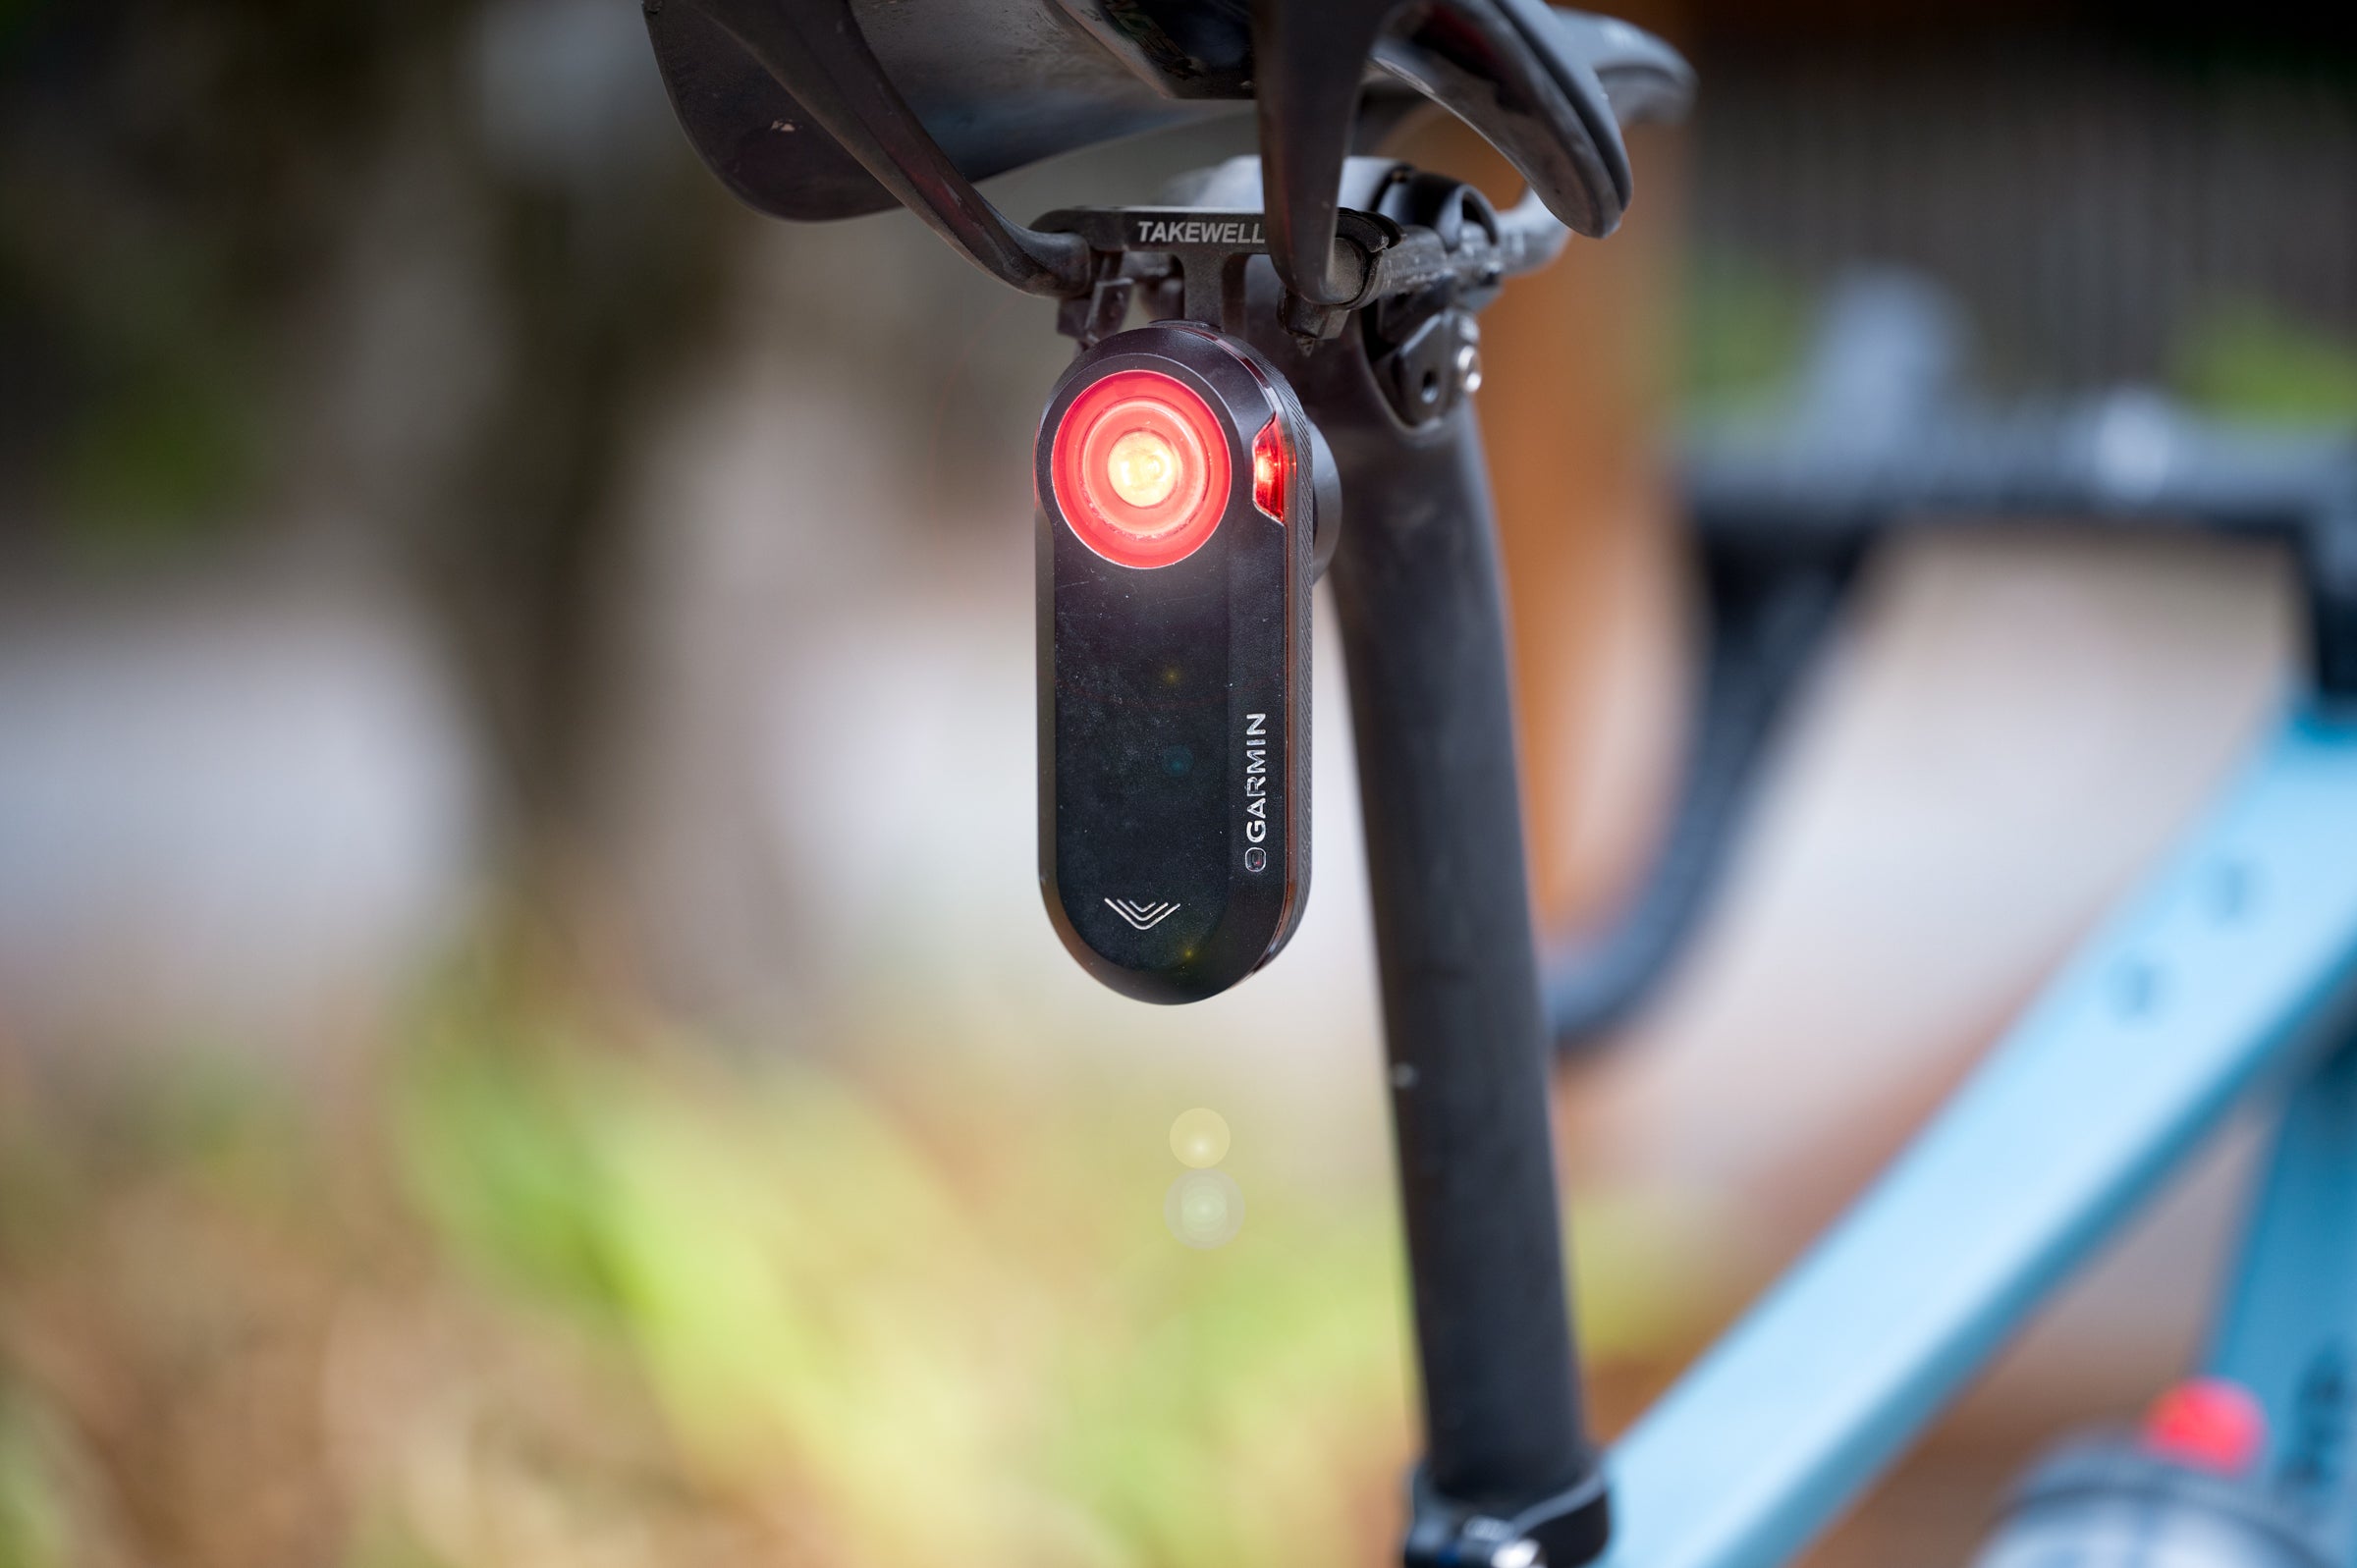
Best rear camera light
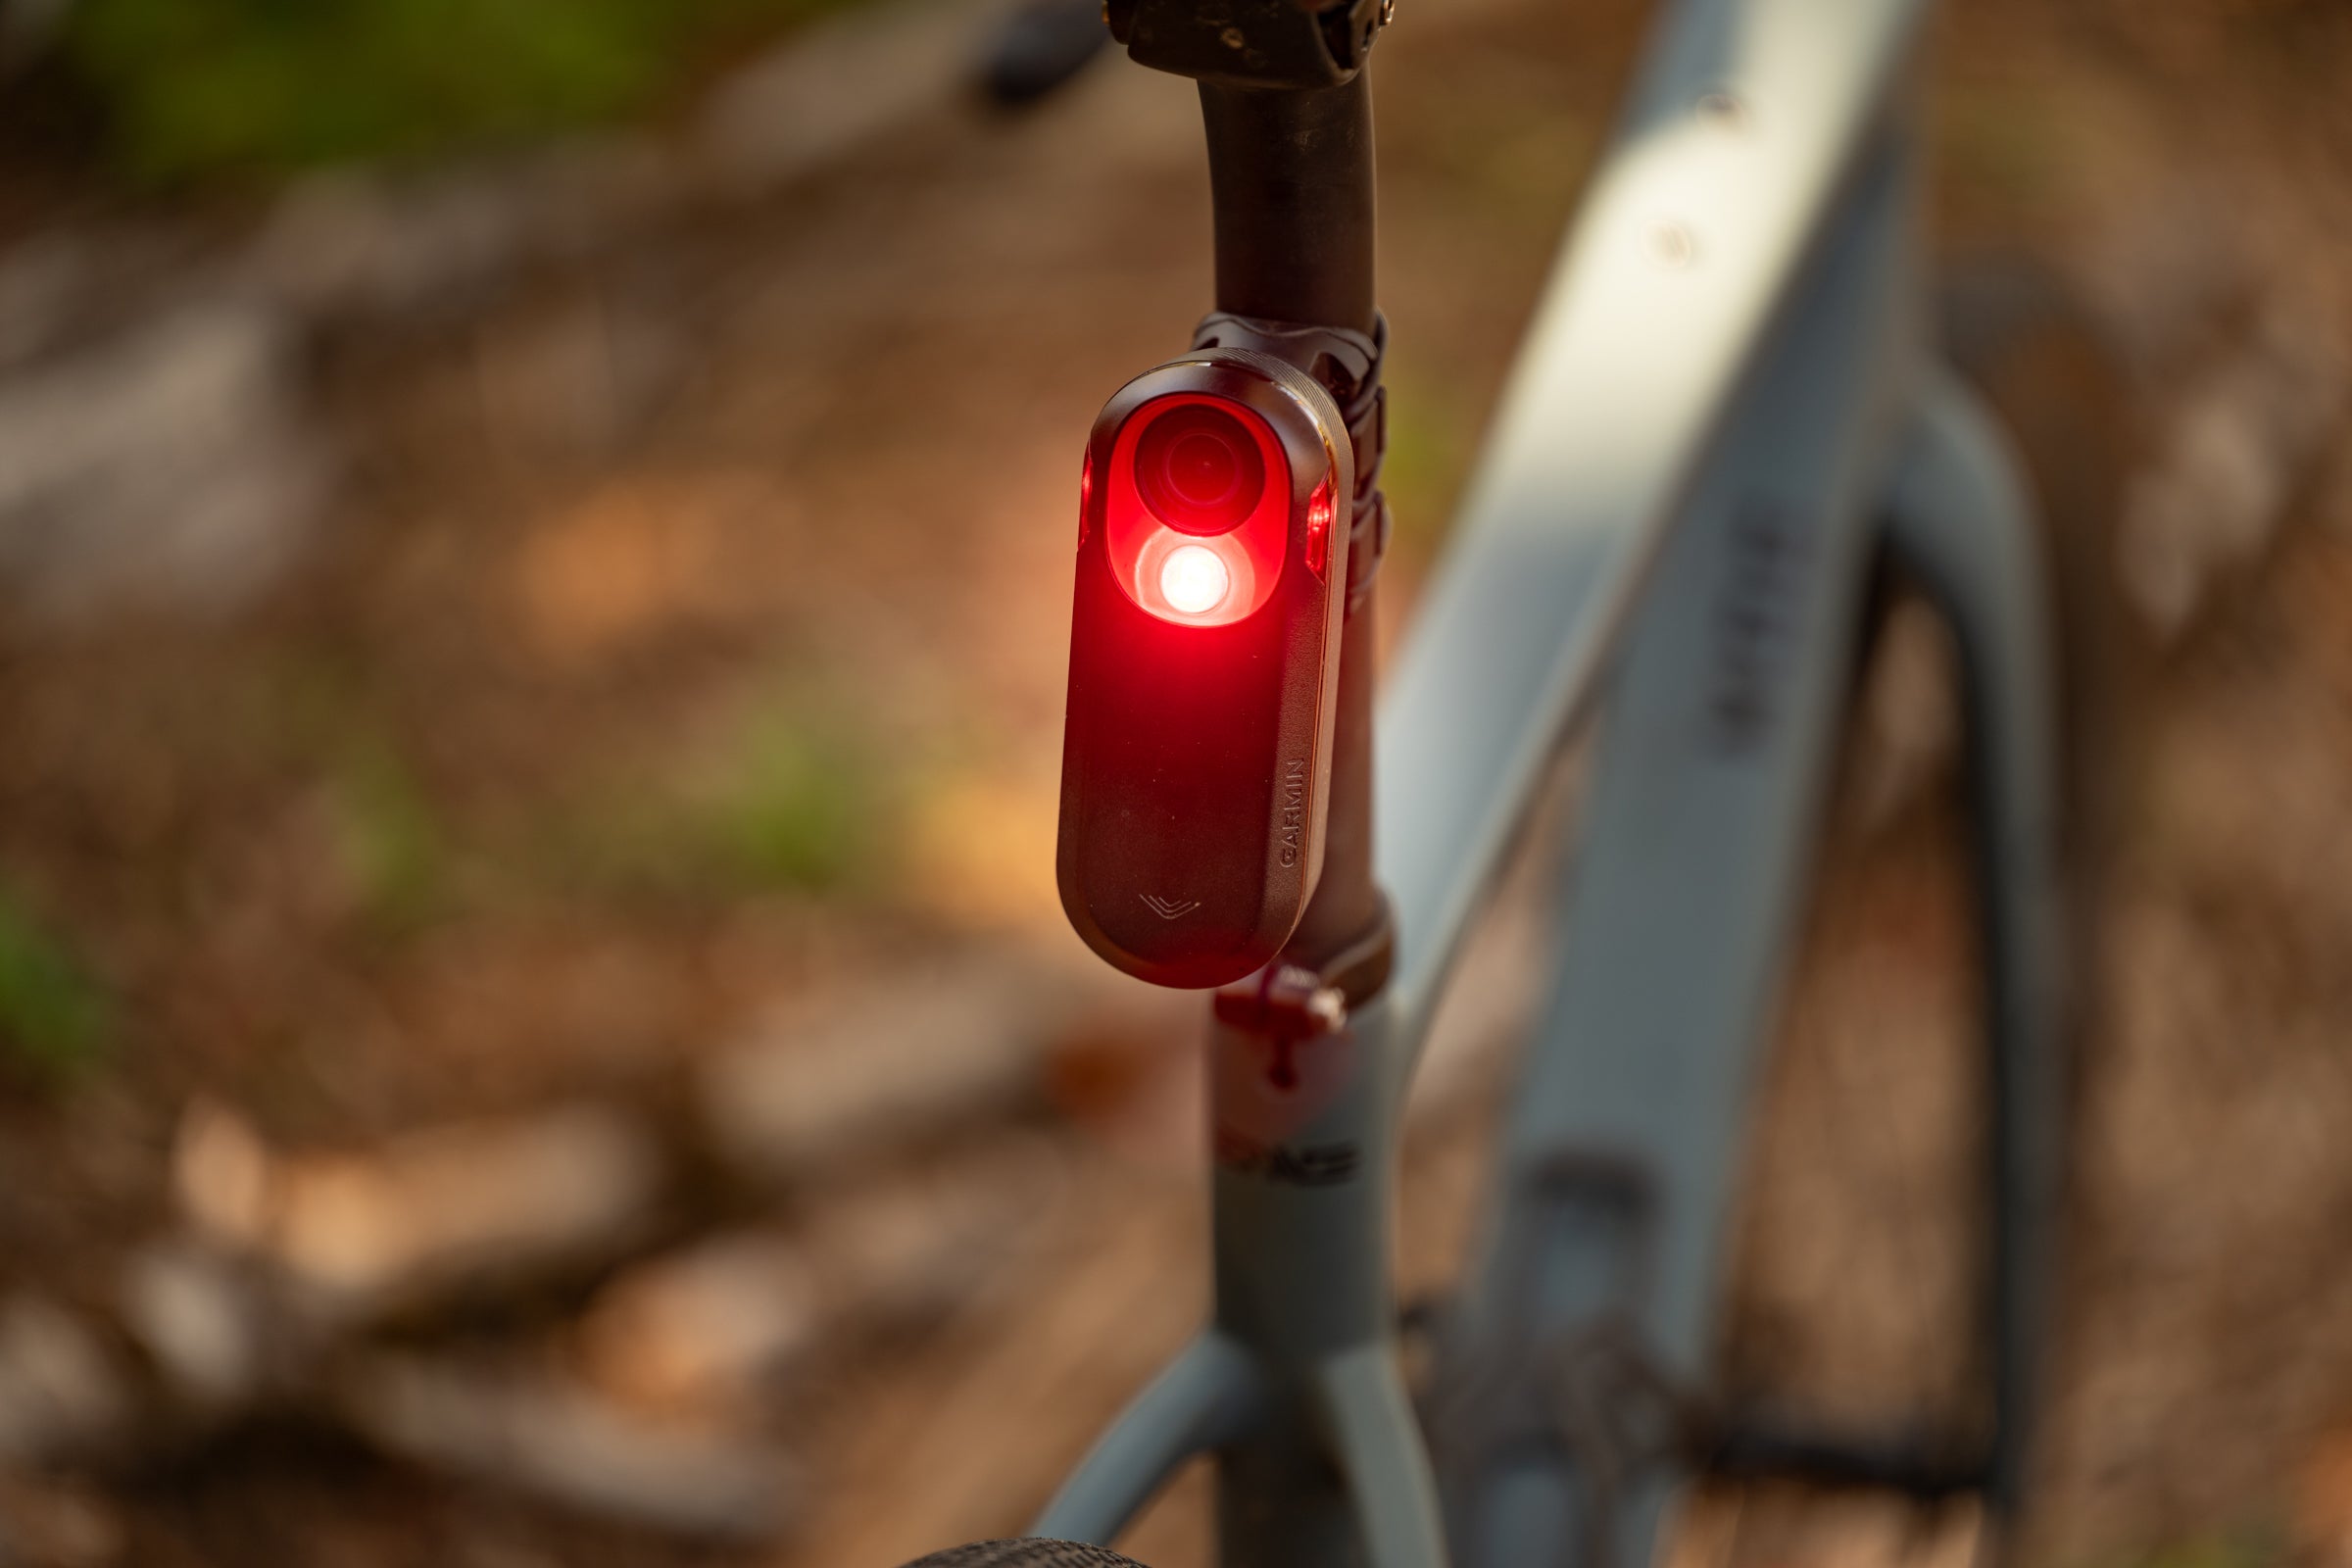
| Model: | Garmin Varia RCT715 |
| Specs: | 65-lumen max output; Six hours with day flash and camera recording; USB-C port; Included band-on silicone mount |
| Highs: | Built in Varia radar; controllable via Edge headunits; stays in sync with Garmin Varia Vue |
| Lows: | Low resolution recording |
The Garmin rear lights are in a weird spot right now. The 515 is an amazing light and radar that desperately needs the updated mount from this unit and a switch to USB-C. Then there’s this Varia RCT715 which gets a great new mount and adds a camera to the equation but only records at a max of 1080p. The reason these all continue to show up in my list is because of the Garmin ecosystem.
ADVERTISEMENT
I recommend everyone uses a rear facing radar unit on every ride. The Varia RCT715 has the same one as the 515 which is without a doubt the best on the market. It’s also a very good light with 65-lumens in the day flash mode and a solid 6-hours of burn time while recording. The camera here is, as mentioned, only 1080p however you can pair it with the Varia Vue front camera and a Garmin Edge head unit and everything works together seamlessly with controls on the headunit.
The other reason this camera still manages to get a recommendation is that you really have to understand what it is. Just like the Varia Vue front camera this is a dashcam, not an action camera. It records continuously then overwrites footage as the card fills up. If an incident is detected then it locks the footage. You won’t be showing off this footage unless it’s too authorities and in that case you can see license plates so the rest of it doesn’t matter all that much.
The specs might seem underwhelming but understand the use case and this is the best choice for what this does.
ADVERTISEMENT
Best commuter pedal Light
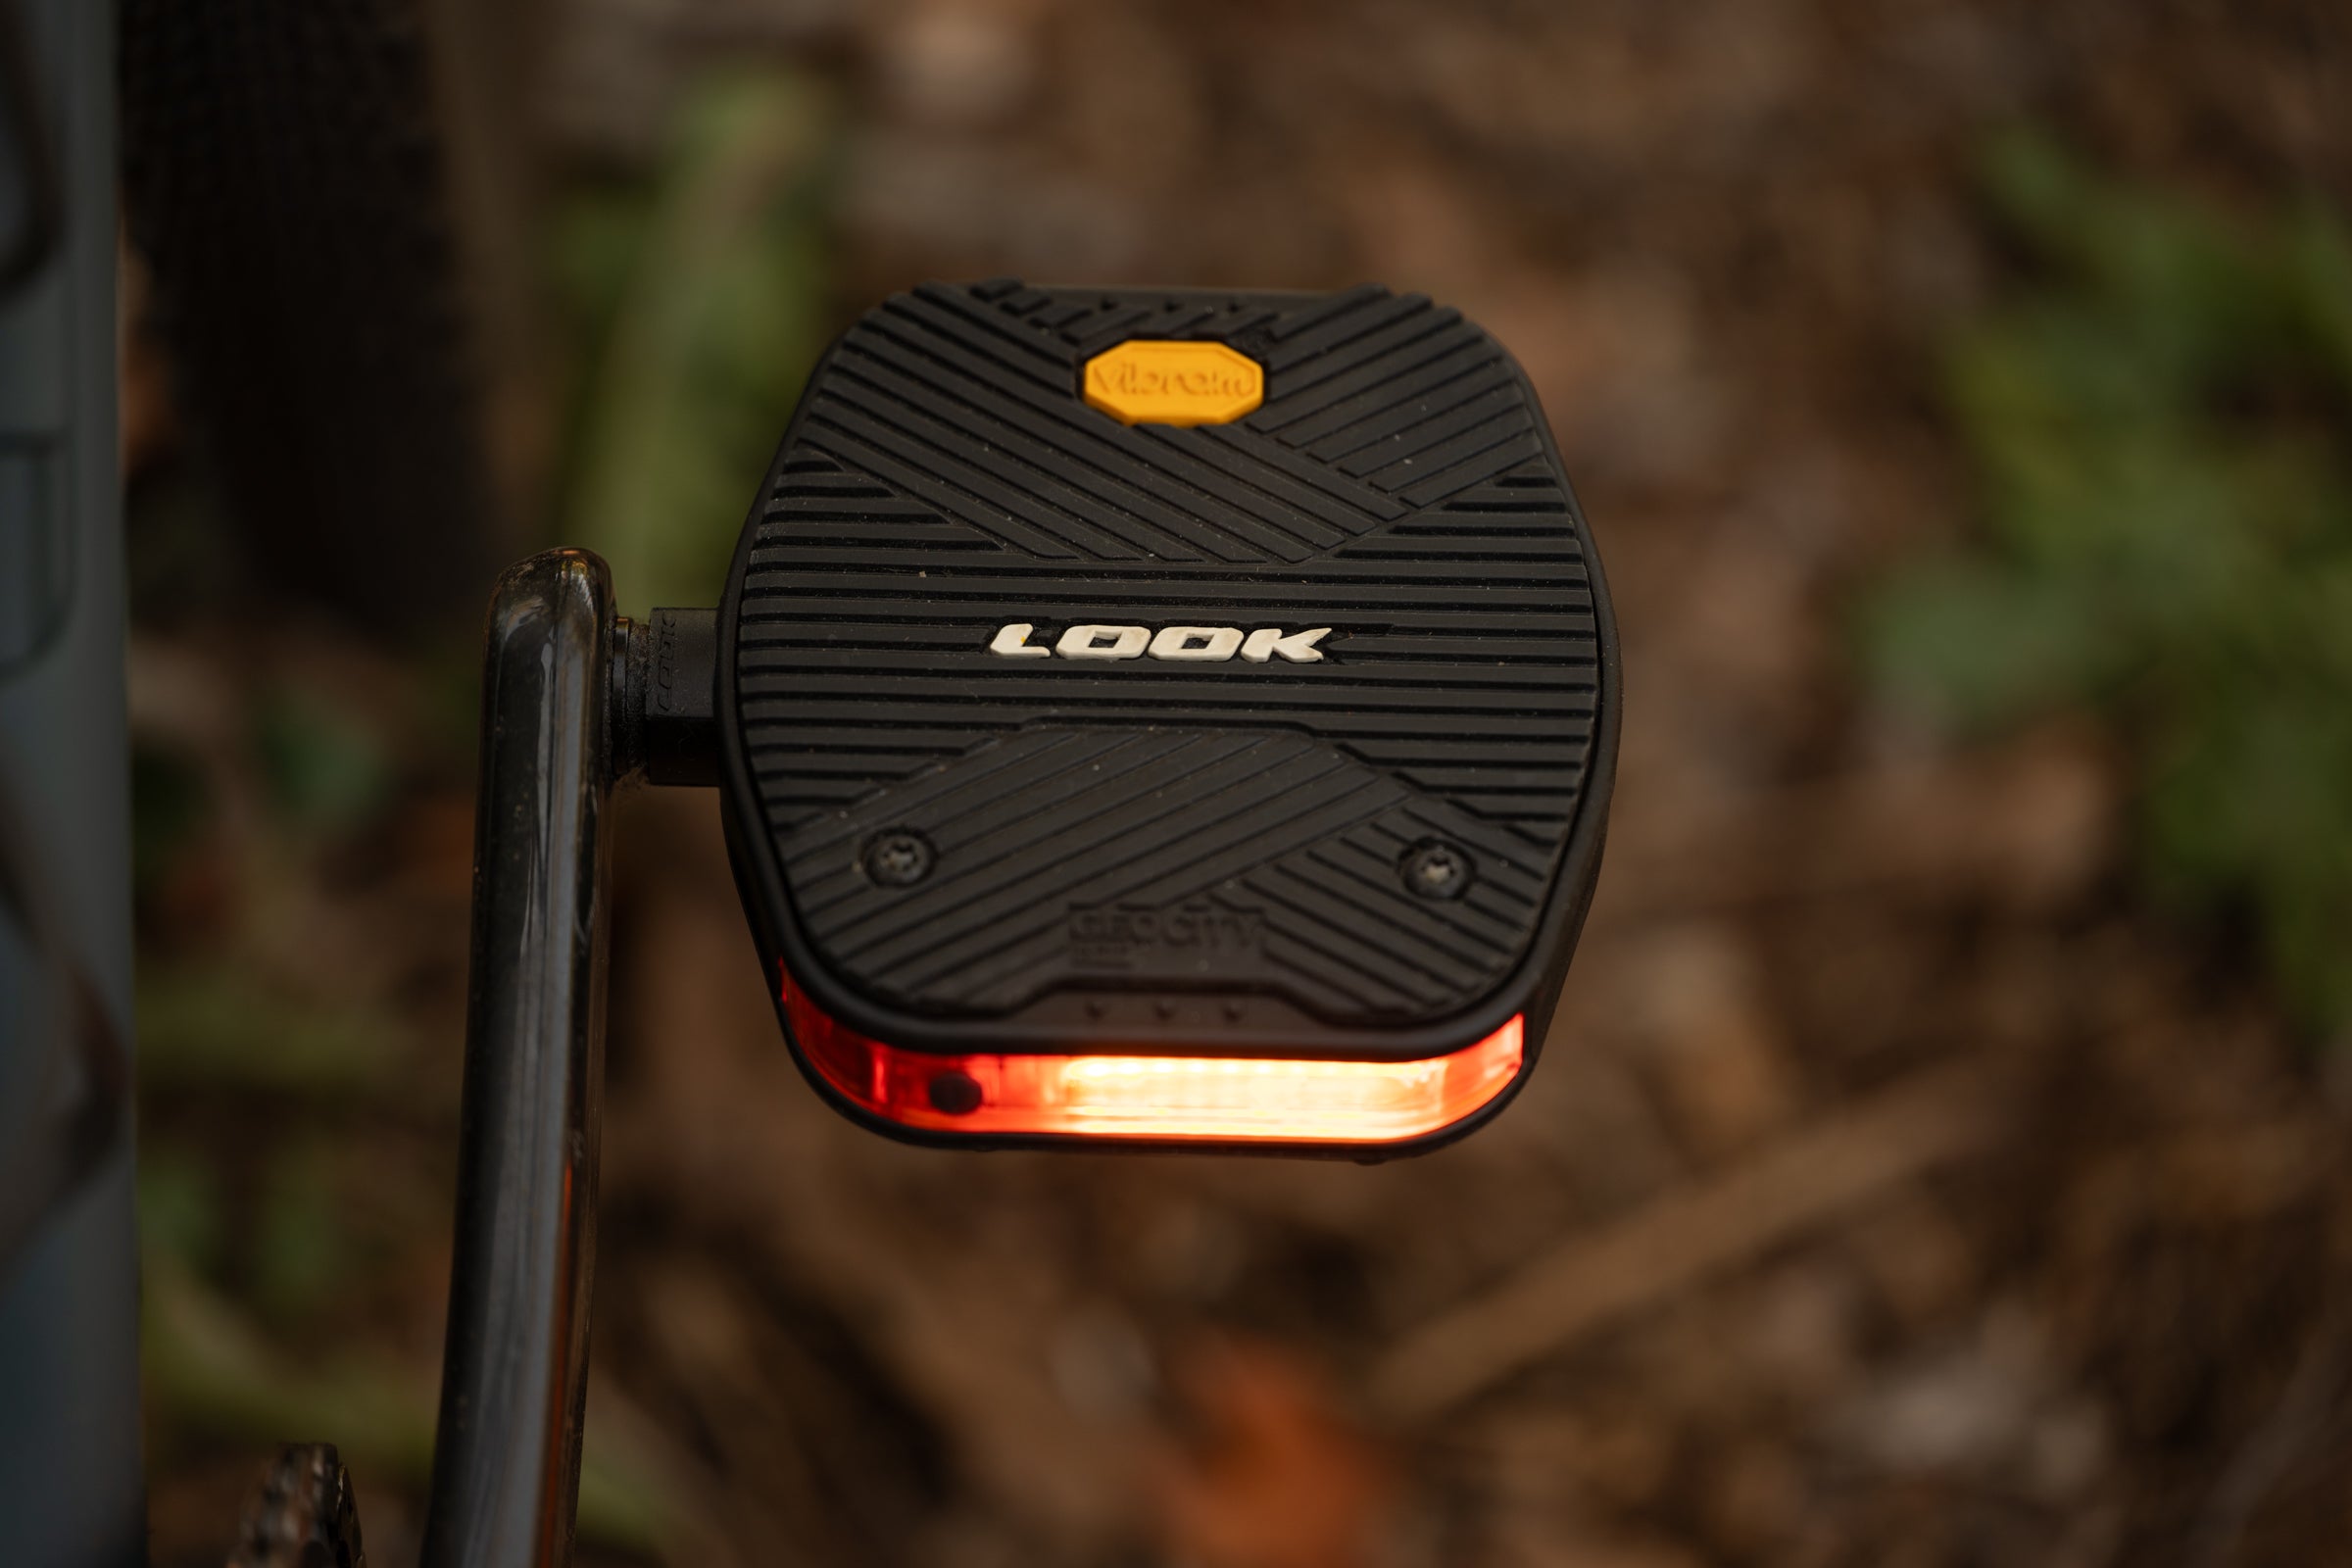
| Model: | Look GeoCity Vision Grip Pedals |
| Specs: | 50-lumen max output; 20-hour ride time; micro-USB; mounts as a standard flat pedal |
| Highs: | Movement creates higher visibility than a static light; alternative upper covers depending on style and usability needs; Large platform |
| Lows: | micro-USB charging |
There’s a great study showing that “A light that directly highlight biomotion makes you up to 5.5X more detectable than a steady light on a seat post.” Which happens to translate perfectly to a light on a pedal making it a little like a flashing light but potentially even more visible. Even more than that though, a pedal light is an extra light. You’ve already got front and rear lights so adding something to your pedal will only help the cause. Which is where the Look GeoCity Vision Grip Pedals fit in.
ADVERTISEMENT
Before you even start looking at the light portion though, these are excellent commuter flat pedals. There’s a nice big platform with a Vibram surface that you can actually swap out should you desire a different color or a more adventure focus with small lugs. These might actually be the best commuter bike pedals then they also get a bright orange light that’s either solid or flashing.
What’s a bit of a shame here is that these are showing their 2021 age a bit and still use micro-USB charging. Each pedal has two cartridges with its own charging port and a rubber cover. Each time you have to open it and plug it in with an increasingly rare cable then get that cover back on. Fortunately 20-hours of ride time will mean it’s not an everyday task.
Best accessory bike light
| Model: | Knog Plus Rear bike light |
| Specs: | 20-lumen max output; 40-hour ride time; integrated USB-A connector; Clips on or mounts via magnetic mount with silicone strap |
| Highs: | Small size; easy mounting; disruptive flash available |
| Lows: | Integrated USB connector is more difficult to plug in |
A lot of people want a small, lightweight, and inexpensive option for mounting wherever. That’s the Knog Plus Rear bike Light (and there’s a front option also).
This isn’t a specific light for a specific situation. Instead you get a tiny piece that will mount either vertically or horizontally with a silicone band. The light itself attaches magnetically to that or you can skip the mount and clip it on to clothes. The output isn’t much but it adds visibility and makes sense in places like seat stays or the back of a jersey.
ADVERTISEMENT
When it comes to charging, as with other Knog lights, everything you need is integrated. This is both a positive and a negative as sometimes the shape makes it more difficult to fit into a USB port (plus Apple laptops don’t have USB-A anymore) but you’ll never find yourself without a cable.
Other bike lights
| Model: | Magicshine Ray 2600B |
| Specs: | 2600-lumen max output; 800 lumen hybrid output for 4.5 hours; USB-C charging; Plastic strap tightens sound handlebars or GoPro mount also included |
| Highs: | Remote included; good price vs output; reverse charging available |
| Lows: | Overly complicated |
| Bottom line | This is a good light for the price but it has six modes plus an app when it really only needs three options. |
| Model: | Outbound Lighting Detour |
| Specs: | 1200-lumen max output; Medium output for 4.2 hours; USB-C charging; Plastic hardmount and Action camera mounting |
| Highs: | Hard upper cutoff to beam; comes with a charging cable that seals against water; excellent reflector |
| Lows: | Needs more lumens |
| Bottom line | The Detour light is one of the best on the market and is uniquely able to charge in the rain while being used. It’s only down here as the latest Exposure Lights upstage it. Despite that it’s a good price so it’s worth a purchase if you can deal with slightly lower output. |
| Model: | Wahoo Trackr Rear Radar |
| Specs: | 53-lumen max output; High Flash gives 10-hour battery life in testing; USB-C charging; Fits many Garmin quarter turn mounts and includes a rubber strap plus adapters for different types of seat posts |
| Highs: | Included mount is easy to get on a seatpost; excellent at detecting cars; Secondary LEDs for side view |
| Lows: | Battery life does not match specs |
| Bottom line | I spent tons of time trying to match the Wahoo specs with my experience but I never could. I was able to get 10-hours of battery life compared to 16-hours for the Garmin equivalent. This is a great rear radar but it’s more expensive for less burn time. Grab it if you really want USB-C charging. |
ADVERTISEMENT
How to choose the right bike light
How does anyone find the best bike light that fits their needs in a sea of options? We’ve done our best to pull together some tips and considerations to help you figure that out.
How many lumens do I need for a bike light?
Lumens (seen often as lm) is a measure of the total amount of light emitted from a bulb. More lumens means a bike light might be brighter, but a higher lumen count doesn’t necessarily make for a better bike light.
Among other things, this is because measuring lumens can be inconsistent between lights and brands. Then, even if you measure in a way you can compare, the type of light and the lens design can make a huge difference in how many of those lumens are actually useful at night.
ADVERTISEMENT
That said, there are some general guidelines worth considering. For front lights, anything under 400 lumens is likely a light meant to make sure you are visible rather than let you see. If you want to see where you are going you need to start looking above that number but this is where it really gets murky.
It used to be that 600 lumens was an absolute minimum to ride at night without street lights. Fortunately more efficient reflector designs have helped this. In recent years, I’ve been quite happy even as low as between 400 and 500 lumens with the right light when riding outside the city. You definitely don’t want that to be your only choice though.
A low powered light will also have a small battery and very little room for error. Even if you have a light with an incredible reflector you want to purchase more power than you need. The light will gain efficiency running at half power vs full power and if you get nervous and want some extra light it’ll be there.
What kind of beam pattern do you need?
Lumens are the total amount of brightness out the front of a light, and critical for being seen. But for seeing down the road, path, or trail, total brightness is irrelevant if the light doesn’t go where you’re trying to see.
ADVERTISEMENT
Beam pattern is the spread and shape of the light. A wider beam is better for seeing a larger area, as well as being seen from wider angles. A narrower beam is better for focusing your lumens on a specific spot, like further down unlit bike paths.
The general rule of thumb is that for being seen on city commutes you’d want a wide beam, high lumen light. For seeing on country roads you’ll want to consider a narrower beam pattern with more throw. For race-pace gravel riding in the woods some riders will pair a wide beam on their bars with a narrow beam on their helmet.
How much battery life do you need in the best bike light?
While there are plenty of bike lights that use their own external battery packs, most bike lights for road, gravel, or commuting will have an internal battery. You might want a light with a ton of battery life, but that will almost certainly come at the expense of size.
Our best advice is to figure out how long your long night rides might be and match it to how many lumens you need.
ADVERTISEMENT
If you need a light for riding for two hours at night, and you’re riding at a moderate pace on the road, you’ll want to find a bike light that has at least 2.5 hours of battery life at 600-800 Lumen output. This choice will allow you to confidently ride at night, and have a bit of battery life buffer should you find yourself out for longer than you expected, or during cold temperatures.
Another important factor is whether or not the batteries are expandable or replaceable. Can you bring a spare battery? Or is there a USB-C battery pack you can use to extend your runtime? And can you replace the battery with a fresh one once it’s had a boatload of charge cycles and stops holding its full capacity?
How long should my bike light battery last?
Always overestimate your needs and underestimate the specs. If you are trying to ride through the night on an epic adventure the last thing you want to start worrying about is an ever-dwindling light supply. Look at how long your ride will last then make sure you have a light that gives a comfortable buffer. Then size up just in case.
ADVERTISEMENT
For commuting things are a little less serious but you should still overestimate your needs. After a long day at work and a rainy ride home it’s very easy to forget to charge your light. Longer battery is more convenient because you will need to charge it less.
Whatever your need, keep in mind that brighter lights have bigger batteries and you can turn them down. A 2000 lumen light will require a bigger integrated battery than a 1000 lumen light because some people will need a reasonable burn time at full power. Instead, you can halve the power and double the burn time plus if you ever need more light, it’s there.
How do I mount a bike light to my bike?
For riding on the road, a single light mounted to your handlebars and seat post is enough. Mountain bikers often use a helmet-mounted light to illuminate where they are looking as well but road bikes typically track with your head making that unnecessary.
ADVERTISEMENT
To mount those lights front and rear, the easiest will be some kind of silicone or rubber strap. You don’t have to think too much about this as long as it fits around your handlebar or seatpost. You might look for an upgrade though.
More and more modern performance road and gravel bikes will have various oddly shaped and integrated handlebars. In those situations a light with an action camera mount makes a lot of sense. It allows for mounting under an out-front mount where you have your bike computer. Make sure you have a good one of those though as lights can be heavy.
Another consideration is removal. If you are looking for the best commuter bike light you probably need to remove it to prevent theft. Alternative, the best performance bike light isn’t likely going to stay on your bike all the time. In both situations you also need to charge and it can be a hassle to get it aimed just right. You want something you can easily take on and off your bike then replace.
Should you use a dynamo hub light?
Maybe. There are a few advantages to a dynamo-driven bike light. The biggest is that because they’re powered by a generator hub built into the front wheel of a bike, they offer light without needing to be charged. That itself should be a serious consideration if you find yourself frequently riding at night.
ADVERTISEMENT
The best dynamo light systems also offer a way to charge your other accessories, like a GPS bike computer, while you’re riding. The same can be said for an increasing number of battery-powered bike lights.
Our list of bike lights does not include dynamo lights because they require a number of non-light components. They are worth considering for specific needs though.
Do I need multiple front bike lights?
Again, maybe. Particularly if you ride off-road, or in places without any ambient light to help you out.
In these situations, you might want a light with a wide-spread beam on your bike, and a narrower, more focused beam on your helmet.
ADVERTISEMENT
Should you buy a StVZO light?
StVZO stands for Straßenverkehrs-Zulassungs-Ordnung and it’s a specific German Road Traffic Registration Regulations. You’ll often hear this brought up around concerns of blinding other road users and it’s a requirement for lights sold in Germany.
Outside of the German market you’ll have a tough time even finding a StVZO light but don’t stress about this. A good light will use an effective reflector to maximise brightness and battery life while also directing the beam. Take care to aim it precisely and it’s unlikely to be an issue. There are also non-StVZO lights that prominently discuss the cutoff characteristics of their lights if you still have a concern.
How do we test bike lights?
I’ve taken a very real world approach to testing these lights. Instead of trying to test specific lumens or check the specs, I just put them to use. The lights I’m recommending are lights I have ridden with and found to be a good option based on features like price and mounting style. Not every light will work for every situation but if it’s here in this list I’m recommending it as a product worth your money.
ADVERTISEMENT